Wednesday, January 30, 2013

Season Of Joy Tree card

I had the Season Of Joy stamp set on my wish list for ages, and finally got it just after Christmas this year. I have been excited to use it, as I love the tree image. It was perfect for this week's card challenge over at Merry Monday.

This week we had to use the following graph for a TIC TAC TOE Challenge.

 
I decided to do the bottom row of Designer Paper, Red and Green and Ribbon. Here in New Zealand we do not get snow at Christmas, and I was running out of blue paper after the birth of three nephews!


Green is the colour of Christmas trees, and I loved the deep burgundy and red colour of this paper. Red and green is such a classic combination, and still one I use the most for my Christmas cards and layouts.
 
This card was so quick and easy to put together, but I really like the finished look and I could see myself making a lot of this design for Christmas. The sentiment is actually a burgundy colour, but looks brown in this photo.
 
Supplies used:

Creative Memories: Nordic Christmas PP, white cardstock, 12" Rotary Trimmer, Precision Point Adhesive, Tape Runner.

Stampin' Up: Garden Green 1/4" Grosgrain Ribbon, Mini Glue Dots, Garden Green Ink, Bravo Burgundy marker, Chocolate Chip Marker, Season Of Joy stamp set, Loads Of love stamp set.

Wardrobe Wednesday

Thanks to Miriam at Create Hope Inspire for intoducing me to Wardrobe Wednesday! I find it hard to look styled and put together when I will most likely get puked on, get food over my pants, and get my hair and jewellery pulled. But today I had a few things to do so I thought I should make an effort!

I am pretty pleased as I bought these pants at Christmas time, and they only just fit. But today I could fit into them with a bit of room to spare. I thought it could be risky wearing white out and about, but it is so hot in Christchurch today and all my shorts are in the wash. My pants weren't actually wonky, I am just bending one leg in this picture for some reason.

 
Top: Shanton (although from my sister's closet!)
Pants: UnderCoverWear convertible cargoes
Shoes: Hannahs
Earrings: Diva Bling
 
I had my hair up for a change too, since the wind has a habit of blowing my hair in my face and I was doing a fair bit of outside play today.
 
I have had to take a full inventory of my wardrobe since losing the baby weight. I got rid of three bags of old, too big or out of date clothes, and sent them all to the Salvation Army. I am slowly now building up my wardrobe with classic pieces that I can mix and match. I have a list of some staples I need to buy, and I sometimes allow myself a splurge on a trend piece, but for the most part my style is pretty simple. I did see a navy striped top like this paired with a pastel yellow skirt, so I am on the hunt for one but can only find mustard yellow. However, I think the white pants will feature a bit more in my weekdays as they are still looking pretty clean even after peaches, tomato sauce and dirt nearby.

Monday, January 28, 2013

Birthday Cupcake Card

Time for another sketch challenge at Seize The Birthday!

This week's sketch is a fun feminine theme, pictured below.


I have been going through a lot of my old stash recently, and stumbled upon a whole lot of girl stuff I bought for my niece's album and then never used. Some of it was perfect for a feminine birthday card.

Here is the card I made:


I cut out the oval and embossed it, and used the cupcake and banner stickers from my stash. Perfect for my niece's birthday coming up in March!

I had a lot of fun with the sketch this week, and I am enjoying seeing the cards everyone else has been making. Thanks for looking!

Supplies used:

Creative Memories: White cardstock, Pink Lemonade cardstock, Butter cardstock, 12" Rotary Trimmer with straight and scoring blades, Gazebo Birthday Stickers, CCS with oval patterns.

Stampin' Up: Up Up and Away stamp set, Regal Rose marker, large oval punch, Perfect Polka Dots embossing folder.

K and Company: Candy Stripe 12x12 paper.

Other: Cuttlebug

Saturday, January 26, 2013

A cup of tea- yes please!

I have been trying to cut down on the amount of coffee I consume each day, and have rediscovered my love of a cup of tea. When I saw that the CASology theme this week was Drink, I knew it was the perfect excuse to use some cute tea party stickers I recently discovered in my stash.

I have at least two friends over a week for a cuppa and some baking, so this card fit my personality perfectly:

 
The card is plain white cardstock. I found this cute quote online and ran the cardstock through my printer to get the quote onto my card.
 
The teapot, teacups and cupcakes are stickers that I have had forever. I raised the teacups and cupcakes on white squares with foam squares underneath to add some dimension. Lastly, I added some pink ribbon to tie it altogether.
 
Super easy and cute! The quote really struck a chord with me, as I know when I am feeling down I can call my friends over for a cup of tea and a chat, and it cheers me up.
 
Thanks for looking!

Freezer Smoothies

It's time for my weekly check in at Getting Fit Friday!

Last week, my resolutions were:
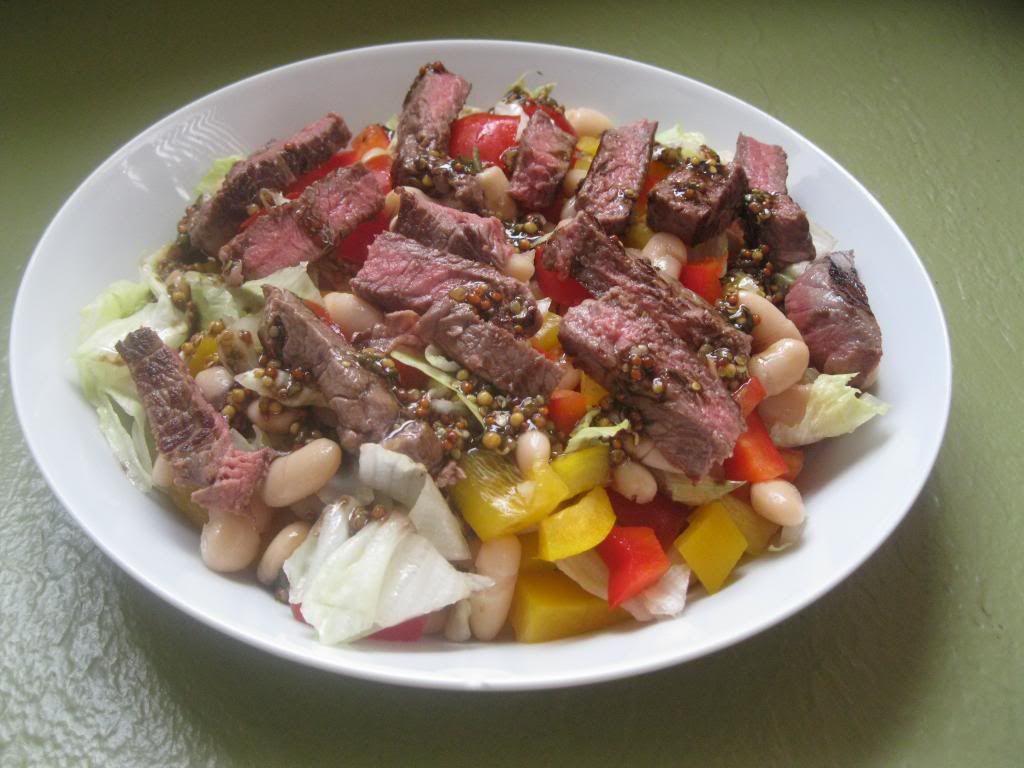
Eat one fish meal.
Done! I made some yummy citrus fish kebabs and served them with a couscous salad. Thumbs up from the hubby too, which is always a bonus! We liked them so much I plan to cook them again next week.

Do two Zumba classes.
Once again, this didn't happen. Adam has been a teething terror and it is taking me two hours to get him into bed at night, so I am missing the classes that start at 7:30. I do have the DVDs but by the time I get out of Adam's bedroom at 9pm, I want to crawl into bed myself because he will be up again by midnight. If anyone has any teething remedies or suggestions please share!

Make up some freezer smoothies.
One of my Pinterest Resolutions was to make some Freezer smoothies for a quick snack during the week for me and my three year old son. I am glad to say I managed to do this, and will give details below.

Go shopping for a yellow skirt now that I am at goal weight.
Due to being at home all week with teething (I wasn't going to brave the mall with a screaming six month old!) I looked at my favourite online shops for a yellow skirt. However, all of the skirts I liked were either not in my size, or a mustard yellow when I am after a pastel yellow. The hunt continues!

The scales have not moved at all this week, but at least I am maintaining after a significant loss last week. I ate so much chocolate on Wednesday night (coincidentally whilst watching The Biggest Loser!) because I was stressed out from Adam's teething. So my goals this week are:

Drink water when I get a chocolate craving.
Have one vegetarian meal this week.
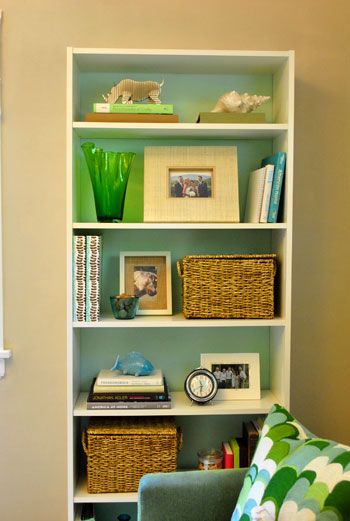
Prepare a snack station in the fridge and pantry for myself and Lucas.
Try to get at least six hours of sleep each night.

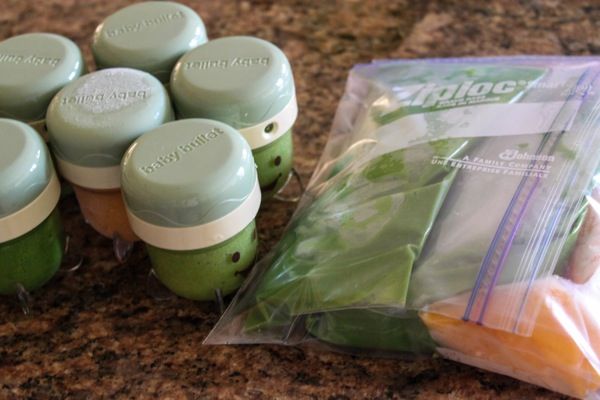
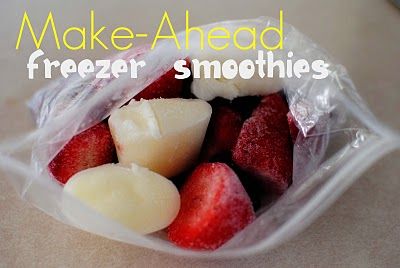
So, the freezer smoothies were super easy to make this week when i had ten minutes to myself. You will need:


2 bananas (not pictured because I had a mummy brain moment)
Frozen berries
2 pottles yogurt (plain or flavoured, i used blackberry)
Snaplock bags
Ice cube trays.

Spoon a tablespoon of yogurt into each of the ice cube trays and freeze for 4-6 hours until set.


Slice up your bananas.

Grab a ziplock bag and in each one put 6-8 banana slices, 2 yogurt cubes and 2 handfuls of berries.


Label them and pop in the freezer!


Blend each one from frozen in a blender with 1/2 cup milk and you have a yummy smoothie in no time! These packets serve me plus my three year old, so will do one large glass per bag.

Friday, January 25, 2013

Ice Cream Cone Cupcakes

We have been blessed with some beautiful summer weather here in New Zealand, and ice cream has featured prominently on my treat radar since it is so hot!

I had a scrapbooking workshop in the weekend with a summer theme, and was looking for something to serve 20 ladies. Ice cream itself was out of the question, so when I stumbled upon cupcakes baked into ice cream cones and decorated with frosting to look like icecreams, I knew I was on to a winner.

You will need:
ice cream cones with a flat bottom
mini cupcake tin
Your favourite chocolate cupcake recipe (my recipes follows)
Three food colourings ( I used pink, blue and green)
Piping bag with a star tip
Sprinkles

The recipe I used for the cupcakes is:

12 tbsp unsalted butter, at room temperature
2/3 cup white sugar
2/3 cup packed brown sugar
2 eggs, at room temperature
1 cup milk
1/2 cup sour cream
1 3/4 cups flour
1 cup cocoa powder
1 1/2 tsp baking soda
1/2 tsp salt

Preheat the oven to 180 degrees C. Place one ice cream cone in each mini cupcake pan.
 
 
In the bowl of an electric mixer, cream together the butter and both sugars on high speed until light and fluffy. Add the eggs one at a time, beating well after each addition, followed by the vanilla.

In a separate bowl, sift together the flour, cocoa powder, baking soda, and salt. Set aside. In a separate bowl, combine the milk and sour cream.

With the electric mixer set on low, add the dry and then wet ingredients slowly.

Fill the ice cream cones with about one tablespoon of mixture each. You don't want them to be too full, otherwise they will overflow during the baking process.


Bake for about 25 minutes or until a toothpick inserted into the center of the cone comes out clean. Remove the cones from the cupcake tin and transfer to wire racks to cool completely before frosting.


My frosting recipe is very simple: 1 cup softened butter, 100g icing sugar and 1 tsp vanilla essence per colour. I used three different colours. You can also flavour your frosting if desired. Fill a piping bag fitted with a large star tip with your frosting, and pipe the frosting over the tops of the cupcakes using a swirling motion, similar to a soft serve ice cream machine. 


Once all the cupcakes have been frosted, decorate with sprinkles or any other decoration of your choice. I did a different sprinkle type for each colour.


The cupcake goes right down to the bottom so that you are not left with an empty cone base, and these will keep for up to four days. What a yummy treat, and you can enjoy these in cold weather too!
 
 
I am linking up to Kitchen Fun Friday!


Thursday, January 24, 2013

Friendship Blossoms Card

Time again for another Use It Tuesday challenge! I am really happy to be using some of my stash.

This week's challenge is "Warm It Up: Use Red, Orange and/or Yellow".

Here are my hoarded supplies:


The piece of paper is from a monthly kit I used to subscribe to at least three years ago. The rub ons were purchased at a Stampin' Up garage sale last April. The flowers were part of a 7x7 scrapbook kit I purchased in 2007 for my niece, and the ribbon was purchased from a scrapbooking store in 2009 before they closed for good. I had completely forgotten about these items, they were all sitting in my orange and pink folder. It shows how often I use those colours!

Here is the finished card:


I placed the candy stripe paper on an orange card base, then added the flowers. I rubbed a sentiment on to some orange paper, and rounded the edges to give it some interest. Then I added the ribbon to break up the elements.

Thanks for taking me out of my comfort zone and making me use orange! I think this card will be finding a new home very soon, it is so cheery and bright.

Supplies used:

Creative Memories: Simply Beautiful paper, Carrot cardstock, 7x7 Family album kit, corner rounder, 12" Rotary trimmer with straight and scoring blades.

Stampin' Up: Loop To Loop rub ons.

Making Memories: Animal Crackers Trims.

K and Company: 12 x12 Urban Rhapsody Candy Stripe paper.

Tuesday, January 22, 2013

For The Birds

This week's Merry Monday theme for Christmas cards is- For The Birds. I have to use a bird image on my Christmas card and this stumped me for a while. The only bird stamps I have are owls, and I plan to use them on some other cards this week so I wanted to do something different.

Luckily, I remembered some old Christmas paper I had lying around that had some cute birds on it. I fussy cut the bird and voila, there was my birdy Christmas card image!

I am not usually a big Christmas paper hoarder. The papers I used are part of a Christmas range but don't scream Christmas to me. However, I do like the colours together and may have to experiment with blue and red more often.

Here is my bird Christmas card:


I am not 100% happy with the sentiment placement, but felt like the card needed some sort of Christmas message on the front. I do like the bird though, I think he is really cute!

Supplies used:

Stampin' Up: Island Indigo Cardstock, Island Indigo Ink, Joyous Celebrations stamp set.

Creative Memories:  Nordic Christmas paper pack, square maker (to make the banner edges), 12" Rotary Trimmer with Straight and Scoring blades, CCS with oval template.

Bella Blvd: Christmas Wishes Collection - 12 x 12 Double Sided Paper - Cute Cuts.

I can't wait to see what next week's challenge is!

Saturday, January 19, 2013

Christmas Cards already?

In December, I was frantically trying to finish 33 Christmas cards to send out to people, as well as planning a third birthday and look after a five month old. So when I saw the Merry Monday card challenge, where you create Christmas cards throughout the year, I was instantly hooked!

This week there was a sketch to be used, which was:


And here is my card:


I stamped the sentiment on white cardstock and then cut it into a circle. I added a little bit of glitter to the snowflake:


The strip was cut out of a piece of patterned paper, and I used a chipboard button from my stash.
 
This was a super easy card to make, but I really like the look of it.
 
Supplies used:
 
Stampin' Up: Season of Joy stamp set, Riding Hood Red cardstock, Riding Hood Red and Gumball Green ink, Dazzling Details Silver Sparkle.
 
Creative Memories: Nordic Christmas paper, Custom Cutting System, Circle Patterns, Square maker, 12" Rotary Trimmer with straight and scoring blades.
 
Echo Park: Seasons Greetings Collection Christmas Chipboard Stickers.

Bear Birthday

It's time again for the Seize The Birthday sketch- the same as last week but this time using a masculine theme. I always struggle with masculine cards, as I can't pretty them up wuith flowers and ribbons, but I had a new stamp that had yet to be used in my Tagtastic set- time to use it!

Here is the sketch:


And my take on the sketch for a masculine birthday card:


I used papers from an old stack called Well Worn, and trimmed the edges with my postage stamp blade on my rotary trimmer. I stamped the bear sentiment and punched it out using my Decorative Label Punch, then adhered it using Foam Squares. The background of the bear was made by embossing navy cardstock using the Stripes folder, then cutting it into the diamond shape using my Custom Cutting System. The finishing touch was the banner off to the side, made out of a strip of the patterned paper and folded to give it a 3D look.

I don't have anyone in mind to give this card to yet, but it is always good to have a stash of cards.

Supplies used:

Stampin' Up: Well Worn DSP, Tagtastic stamp set, Decorative Label punch, Stripes embossing folder, Not Quite Navy, Cajun Craze and Soft Suede inks.

Creative Memories: Navy cardstock, white cardstock, 12" Rotary trimmer with straight, scoring and postage stamp blades, Foam Squares.

Other: Cuttlebug

Friday, January 18, 2013

Beef and Bean Salad

One of my resolutions last week was to try a new salad. I thought I would share the recipe with you as my husband really enjoyed it and said he would pay money to eat it!

Beef and Bean Salad. Serves 2.

You will need:
1 red capsicum
1 yellow capsicum
1/2 telegraph cucumber, chopped
Two tomatoes, chopped
1/2 lettuce, chopped
1 can cannelini beans, rinsed and drained
300g fillet eye steak

1 tbsp rice bran oil
2 tbsp balsamic vinegar
1 tsp wholegrain mustard
1 tsp minced coriander leaves

Mix together the dressing ingredients- put aside.

Combine the vegetables and beans in a bowl. Grill the eye fillet for three minutes each side then rest for ten minutes. Slice into strips then cut in half again.

Place the salad ingredients in each bowl. Place half the steak on top of each bowl, and drizzle with the dressing. Serve immediately.

This was so yummy and easy to prepare.

In other fitness news, after no weight loss last week, I managed to lose 1.6kg (3.5lbs) this week! I am now at my goal weight and feel amazing. I will continue to work on building muscle and endurance for the next couple of months, as well as continuing to drink 8 glasses of water each day.

My specific goals for the coming week are:

Eat one fish meal.
Do two Zumba classes. ( I missed this one last week!)
Make up some freezer smoothies (see this post for more details).
Go shopping for a yellow skirt now that I am at goal weight.

I am hoping to do the 14 kilometre walk/run City To Surf in March so I aim to start walking more this week too.

Thanks for checking in on my progress here at Getting Fit Friday!

Getting Fit Friday

Dinosaur Birthday Cake

We recently celebrated Lucas' third birthday and he had been asking for a dinosuar themed party. I have already shared his invitations here. Of course, I knew that this would mean making a dinosaur cake! I decided to make a 3D type cake, and really enjoyed putting it together. I thought I would share the step by step instructions so that you can make a dinosaur cake too!

You need to make a 20cm diameter round cake and a square cake for this recipe. You can use any cake flavour- I used chocolate cake as that is Lucas' favourite. My favourite chocolate cake recipe is here. You will also need a double quantity of green buttercream icing.

Cut the round cake in half down the middle, then stand each half cut side down and place side by side. Join together using some of the icing.

Cut a good 10cm off the top of the square cake, and then cut the ends off in two triangle shapes at the opposite end. Use the 10cm cut-off piece to create a tail and the four feet.


Start to cover the cake in the green icing. This step may take a while!


For the decorating, you will need:
White marshmellows
1 large Toblerone
Round chocolate biscuits (I used Toffee pops)
Large chocolate buttons
A small quantity of chocolate icing

Use the toblerone to create the dinosaur's spiked nose and the spikes down his back. Dot the dinosuar's body with the chocolate buttons. Add the chocolate biscuits in between the head and body cakes to create the ruff. Use marshmellows for the eyes, attaching with some leftover icing or chocolate icing, and dot them with a little bit of the chocolate icing, and give him a smile!


I am not the best decorator, but my son absolutely loved his cake!


I am linking up to Kitchen Fun and Crafty Friday!


Thursday, January 17, 2013

Rainy day activity- Milk Colouring and Painting.

It has been bucketing down with rain here today in Christchurch, and so I was on the lookout for something for Lucas to do that was still relatively quiet as Adam is teething and needs lots of sleep. I looked on my Pinterest boards and found an idea for Painting with Milk.

You will need:
Shallow dish or lid
Milk (whole is best)
Toothpicks
Food colouring
Paper towels
(optional- paint brush and plastic lid for painting)

All you do is pour some milk into a shallow dish, then add some food colouring. Lucas may have gotten a little carried away with this part! Note to self- buy food colouring with droppers built in to the lids.
 
Then swirl the colours with the toothpicks to make patterns.
 
 
Lucas had great fun mixing the colours together, and you can see that the food colouring will stay seperate for a while to allow you to make some interesting patterns in the milk.
 
 
I love the look on his face!

If you want to, you can then paint with your coloured milk creation once the colours mix together. Lucas happily painted on paper towels spread out on a large plastic lid.


This was a fun rainy day activity that kept Lucas amused while Adam was sleeping. Be warned, it can get messy, so I would suggest painting over a plastic mat or keep lots of paper towels on hand!


Wednesday, January 16, 2013

Blue Baby Card

The theme at CASology this week is- BLUE! A great theme, since my friends just welcomed a baby boy into the world yesterday morning. I am also linking up to CARDZ TV Challenge, which is Baby New Year- Make a card for a new baby.

Here is my take on the theme BLUE and a card for a new baby.


I even managed to include glitter on the whale's waterspout and on the sentiment swirls. Here are some close ups.


I popped the whale up using some Foam Squares to add some dimension the card.


I used this particular sentiment as I thought the swirls went really well with the whale, as it reminded me of waves.  I did the words in Not Quite Navy and the swirls in Tempting Turqouise for a bit of contrast. The ruffled ribbon also reminded me of waves.

Supplies used:

Stampin' Up: Fox and Friends Stamp Set, Very Vanilla cardstock, Extra Large Oval Punch, Tagtastic stamp set, Island Indigo ruffled ribbon, Not Quite Navy ink, Tempting Turqouise ink, Dazzling Details Silver Sparkle, mini glue dots.

Creative Memories: Royal Blue cardstock, Foam Squares, Corner Rounder, 12 inch Rotary Trimmer with straight and scoring blades.

Tuesday, January 15, 2013

Elebration Birthday Card

I was looking for some new challenges when I came across the new Seize The Birthday Sketch Challenge blog, and I am excited to take part in the first challenge!

This week we are to create a feminine birthday card using this sketch:


Here is my take on the sketch:


I added an embossed pink cardstock to a hot pink card, then added my papers. I stamped the elephant (isn't it cute!)and sentiment onto cardstock and cut it out using my Framelits, and inked the edges. Finally, I coloured in the cake and paper pieced and coloured the balloon, popping it up with some Foam Squares.

I used the following list of supplies to make my card:

Stampin' Up: Elebation stamp, Create a Cupcake stamp set, Perfect Polka Dots Embossing Folder, Framelits Labels Collection, Markers in So Saffron, Wild Wasabi, Pretty In Pink, Bashful Blue and Basic Gray.

Creative Memories: Pink Lemonade Cardstock, Raspberry Cardstock, Foam Squares, Delight 12x12 papers, 12 inch Rotary Trimmer with straight ands scoring blades.

Other: Cuttlebug

Monday, January 14, 2013

My Pinterest Resolutions

OK, I admit it. I have a habit of pinning things on Pinterest and never going back to them. So this year I have decided to pick ten things on my Pinterest boards and do them by July. I will share them with you and let you know the results of each one. I try to have a mix of different themes and options so that I can get a good overview of things I want to accomplish. Here is the list, with a brief explanation about the pin and why I want to try it out.


The conveniece of cans is a plus when I have a toddler hanging off my leg and a crying baby. But really, if I make up a good stash like this lady has, it will make mealtimes a lot easier.


We have some leftover paint from the earthquake repairs, and Adam's bookcase is plain white. I think that the look of the painted back is really modern, and so I would love to do this to finish off his room.


I will do this list during February, as it is the month of our anniversary and Valentines Day. I sometimes forget to show my husband how much I appreciate him, so I hope this list will make me be a better wife.

Organise my house.


This is the biggie! I plan to do this in March when Lucas is settled into preschool and we have our TV cabinet and storage delivered. This Pinterest link is amazing- 14 weeks of organising your home, with a focus on a different area each week. I am actually very excited about this one!

Create a play space for Adam.


Lucas has his own play area, so it is only fair that Adam gets one too! I love the look of this area- it seems so inviting and just says "play" to me.

Make this wedding card.


One of my good friends is getting married at the end of March and so I would like to make this style card for her. I like the CAS (clean and simple) look of the card, and I am itching to use the Love and Laughter stamp set!

Stock up on freezer smoothies.


My son loves his "mooovies" as he calls them- and I really enjoy having them too. If I make up a stash of these for the freezer, then we can both enjoy a smoothie at short notice.

Make some laundry art.


I have a three photo frame that is begging for some photos- I thought I could put these cute laundry printables in the frame and hang it in my laundry.

Limit screen time.


I must admit, there are times when I need to get things done and it is easiest just to put a DVD on. I really want to fix this habit, and this lady has great ideas on managing screen time. I want to play more with Lucas, which leads me to my last Pinterest item.

Do the Toddler Bucket List with Lucas.


I love this idea! I want Lucas to be as well rounded as possible. He will be starting preschool soon, and so I want our time together to be exciting and memorable so that he has some great recollections of our time together.

I hope this list has inspired you to cross off some things on your Pinterest boards- I will be checking in as I cross off each item. I am excited to start!


Saturday, January 12, 2013

My fitness goals

It's time again for Get Me Fit Friday link up!

Getting Fit Friday

My goals for last week were:

Do the 30 Day Shred workout each evening.
Have one meat free day this week.
Drink 8 glasses of water every day.
Log my food intake on MyFitnessPal every day. (If you want to add me, I am chile_chicken)

I managed to acheive all of these goals, even working out at 9:30pm on the evening we had family around for dinner. No weight loss this week even though MyFitnessPal tracking looks OK. I guess I have to be patient, but it is frustrating not seeing the scale move.

I have my father's 60th birthday celebration this weekend, which calls for lots of food, so my goals for this coming week are:

Work out at the gym on Sunday morning
Do two Zumba classes
Try a new salad
Limit coffee to two a day- this one is going to be tough!

Thanks for stopping by to keep me accountable- I hope everyone else has had a great week.

Related Posts Plugin for WordPress, Blogger...