Showing posts with label food. Show all posts

Wednesday, December 23, 2015

Need a Nibble?

Nibblish is a great idea to make snacking easy for those of us who want the right combination of good fats, protein and energy after work, the gym or even as a 3pm pick-me-up. Nibblish make healthy snacks more interesting, fresher and easier for busy people who love their food. With the help of a top nutritionist they have developed an amazing range with the perfect blend of ingredients in every snack. Even better, the parenting couple behind Nibblish are based in New Zealand and understand the importance of convenience and nutrition rolled into one.


Each week, Nibblish sends me a box with four pre-packaged snacks featuring baked dried fruit, nuts, seeds, dark chocolate and other goodies. You get to rate the snacks you receive, or change your preferences based on dietary needs or taste, so that each Nibblish box will be full of yummy nibbles. You also get a nutritional information panel for each compartment, so that you know exactly what you are eating. 

Here are some of the flavour combinations I have received so far.


CopocobanaBrazil Nuts, Hazelnuts, Raisins and Dark Chocolate. A standard mix that was great eaten with a cold drink in the afternoon. I really enjoyed the taste of the raisins and there were no surprises with this one. This would suit a lot of different food preference and age groups.


FlorentinePumpkin Seeds, Cherries, Walnuts and Dark Chocolate. Now this I could eat every day! The decadent dried cherries were a tastebud explosion, and I loved the crunch from the seeds. The chocolate pieces were enough to satisfy my sweet tooth and the nuts are always a good choice when paired with seeds and dried fruit.

Chilli Lime BitesChilli Lime Cashews, Blanched Almonds, Red Skinned Peanuts and Pistachio Kernels.My three year old absolutely loved the cashews, as did I. This was a delicious combination that worked well on a hot, sticky day.

Midnight MintCashews, Mint Raisins and Dark Chocolate. I love mint anything, and while it did take some getting used to as I would expect the mint flavour from the chocolate, not the raisins, the aftertaste was very pleasant and I enjoyed this as a late night snack with my TV watching. 

Pina ColadaNatural Pineapple, Walnuts and Coconut Flakes. I did something a bit different with this mixture and added it to my overnight oats. It gave my breakfast a real tropical punch and was a great way to start the day. The pineapple was delicious!


Berry CocktailCherry, Apple Strawberry Bites, Orange Raisins and Orange Infused Cranberries. I loved the fruit bites in this mix, but the orange flavoured dried fruits weren't my cup of tea. My boys really enjoyed this mix though, and so I don't mind them having it as a snack or on top of yoghurt. 

Lemon Lime InfusionPineapple, Lime Raisins, Natural Apple and Lemon Raisins. I really liked the pineapple in this mix, but once again the different flavoured raisins threw me off. I have decided that citrus flavours aren't for me, I prefer tropical and berry flavours. 

Moroccan DelightMoroccan Cashews, Dates and Coconut Flakes. This was a surprisingly sweet combination, lovely and sticky and somewhat decadent. It was a real delight, and I hope to get this one again soon. 

Orange CrushOrange Raisins, Orange Cranberry and Dark Chocolate. These orange flavoured fruits feature again in this mix, however I found this mixture to be less intense than the other two as the chocolate rounded it off nicely. 

If this idea looks like something you would like to try for yourself, use code RC-85-412 to get your first box for just $3.50! That is 65% off with free shipping included for four delicious snacks. 

Please note: I was not compensated in any way for this post. If I find a product or service I love, I just want to share it with my readers, and this was the case with my Nibblish subscription.

Wednesday, June 3, 2015

WCW Easy Snack Mix


Both my boys have been a bit sick this week, but that doesn't stop them from feeling hungry! Soup and toast have been high up on the menu, but I wanted to put together a snack mix that I knew wouldn't be too harsh on their throats, as they are having trouble swallowing pretzels and cereal pieces.

Both of my boys love popcorn, so this formed the basis of the snack mix.

Easy Snack Mix
1 cup air-popped natural popcorn
1 cup mini marshmallows
1/2 cup raisins
1/2 cup Sunsweet Diced Prunes

Mix everything together and serve!


You can add anything you want to this mix- the popcorn adds a lot of volume to the snack without being too filling, and the prunes help with any digestive issues! Nuts, cereal pieces, other dried fruits and chocolate would all go well in this mix.

What do you like to put in your snack mix?

Wednesday, April 15, 2015

WCW Tropical Teacakes


Those pesky bananas are still lurking in my fruit bowl as my 2 year old insists on buying them every time we go to the supermarket! 

I decided to whip up these teacakes instead of the usual muffins or bread. I used a pretty baking mold but you could use a mini loaf pan or muffin trays instead. These are dairy and egg free, and perfect to whip up for a quick afternoon tea.

Tropical Teacakes

2 cups flour
3/4 cup sugar
1 tsp baking soda
1/2 tsp salt
4 tablespoons Healtheries Black Chia seeds
4 tablespoons ground flaxseed
1/4 cup cold water
2 small bananas
1/2 cup orange and mango juice
1/2 cup dessicated coconut
extra 1/4 cup orange and mango juice

Preheat oven to 160 degrees celcius.

In a large bowl, mix the flour, sugar, baking soda and salt together. Create a well in the center and set aside.

Mix the water, flaxseed and Black Chia seeds to form a paste. Mix in mashed bananas and juice and add to the dry mixture. Mix well.

Fold in the coconut and add extra juice if needed. You want the mixture to be quite runny, about the consistency of pancake mix.

Add a dessertspoon full of the mixture to each mold or muffin tray. Bake for about 20 minutes, or until tops are lightly browned.


Serve warm or keep in an airtight container for up to three days.

Friday, January 23, 2015

Breakfast Bounty at The Shroom Room

I was lucky enough to try out one of the newest cafe attractions to Lyttleton in the new Albion Square- The Shroom Room- for a birthday breakfast.

Walking in, the atmosphere was very inviting and I was taken by the striking black decor and rock n' roll vibe. Handwritten chalkboard menus showed the specials, and the cabinet food looked divine. The selection of pizzas, muffins and sweet treats in this vegetarian and vegan inspired eatery will leave even the meat eaters happy with the options supplied!

It was a bit too early in the morning to be having pizza, so we opted for the breakfast menu. But first came the coffee- a great size and a great price too!

 Photo courtesy of Melissa 
The menu had a great selection of breakfast fare, and a lot of the ladies chose to go with the hash breakfast. Poached eggs, hollandaise sauce, spinach and homemade hash cakes that were generous in size, delicious and well presented.

I opted for the muesli, berry compote, fresh fruit and yoghurt. The presentation was amazing, with a cute chopping broad, springs of lavender and even a fancy milk jug. The food itself was delicious and I may have sparked fresh fruit envy!

Sunlight streamed in, and this cafe boasts an excellent indoor/outdoor flow. You could sit inside on colder days, but the courtyard looked extremely inviting and looked out onto the action. On Saturday the Lyttleton Farmers' Market was running, which meant that the cafe was busy but we did not feel it was too noisy or crowded. It was still a very peaceful place and I thoroughly enjoyed my breakfast.

All of us raved about our meals, and it is safe to say we will be experiencing The Shroom Room again! I can't wait to take my husband and boys here, The Shroom Room has got a perfect combination of healthy, flavoursome food and a relaxed atmosphere that is popular with locals and visotors alike.

For more reviews, check out what Anisa and The Press have to say about The Shroom Room.

Tuesday, January 13, 2015

Pinterest Resolutions Jan-April 2015

My Pinterest Resolutions so far have been mostly successful, so I think it is time to choose a few more to attempt!

If you are new to my blog, each six months I have been choosing some items that I have pinned on my Pinterest Boards, and will complete the idea, creation or activity.

Instead of six monthly, I will now break these down into four month goals. I feel like I forget about some of the things I want to do during a six month time period, so four months gives me a good amount of time but not too much.

As far as blogging goes, I like to plan ahead and so this way of planning a year of blog posts is definitely something I need to do!

We are heading on holiday soon, and I need to pack light. This guide on a capsule wardrobe for a beach vacation will be perfect for me to get a variety of outfits with minimal space.

All of the males in my family are big on quality time, so for my 2 and 5 year old I will have to make up these Valentines Day coupons for them to take advantage of some special activities with me, Dad and as a family.


I love making cards, and this video showing how to make 12 cards in less than 20 minutes is something I need to try once I get the Wishes book!


My boys love bananas, peanut butter and frozen yoghurt, so making our own peanut butter and banana frozen yoghurt will be something we can all do together and enjoy.

My boys also love treasure hunts, and Easter is a perfect time to do them. How cute is this active Easter Egg hunt? Great to get the kids up and moving.

These should all have been put into place by the end of April- make sure to check back to see how I am doing!

Wednesday, December 31, 2014

Top 4 recipes of 2014

I can't believe that the end of the year is upon is- it seems so cliche but time really does fly when you have little people to run after.


We have been busy cooking up a storm this year, so I have rounded up my four most popular recipes for 2014.

At number four is the Raspberry Lamington Cake I made for my husband's birthday. Layers of cream, fresh raspberries and sponge make this into a decadent giant lamington.

The third most popular meal is Meatball Pizza, a combination of two of my son's favourite foods.

The second most popular recipe is a delicious Rhubarb Spicetrail Shortcake, which is great served warm or cold.

Number one is Roast Pumpkin and Cashew Chicken Curry- still a family favourite!

Thank you to all of you that have left comments, supported my blog posts and given feedback this year, and also a huge thanks to those of you who have made these recipes yourselves and let me know! I can't wait to share some more tasty dishes in 2015.

Linking up with Wow Us Wednesdays and Best of 2014 Link Up Party.

Wednesday, October 8, 2014

WCW Coconut Curry Fish Pie

Welcome to the latest edition of What's Cooking Wednesday!

I try and fed my family at least one fish meal a week, and this pie was an experiment using some leftovers and spicing up my plain fish pie.


Coconut Curry Fish Pie

75g butter
1/4 cup plain flour
1 cup coconut milk
2 carrots, finely diced
1 cup frozen peas
1 cup frozen spinach
265g tin smoked flavoured tuna
1 tablespoon lemon zest
1 teaspoon curry powder
1/2 cup white wine
3 golden kumara (sweet potato)
25g coconut oil (or butter)
3 hard boiled eggs, quartered
1/4 cup Parmesan cheese, grated

Preheat the oven to 180 degrees C.

In a saucepan, melt the butter over medium heat then add the carrots, peas and spinach to heat through.  the flour to make a roux. Mix in the coconut milk gradually.

Fold in the tuna and lemon zest, then add the curry powder and white wine. Simmer over a low heat for ten minutes.

Meanwhile, prick holes in the kumara with a fork and steam in the microwave for seven minutes until soft. Mash together with coconut oil, or you can substitute butter.

To assemble the pie, pour the fish mixture into a heatproof pie dish. Place the boiled egg quarters on top, then top with the mashed kumara.Sprinkle with cheese.


Bake in the preheated oven for 25 minutes until golden and bubbly.


The verdict- My husband and I really enjoyed this pie and even went back for seconds, The boys weren't too fussed about the pie filling, but did eat the eggs and carrots!


Wednesday, October 1, 2014

What's Cooking Wednesday- Lazy Girl Scones

I like to have fresh baking in the tins when I have unexpected visitors, but sometimes my tins are empty and I get a text that my friend is coming over in half an hour.

This scone recipe is what I call my "Lazy Girl" scones- they take 10 minutes to whip up, then 15 minutes in the oven, then they are ready to eat!

You will need:
3 cups plain flour
4 teaspoons baking powder
1/4 teaspoon salt
50g butter, cubed
1 1/4 cups milk
1/2 cup chocolate chips
1/2 cup dried cranberries

Preheat the oven to 220 degrees C

Sift together the flour, baking powder and salt.

Add the butter and run into the mix until it resembles breadcrumbs. Add milk and mix to a soft dough.

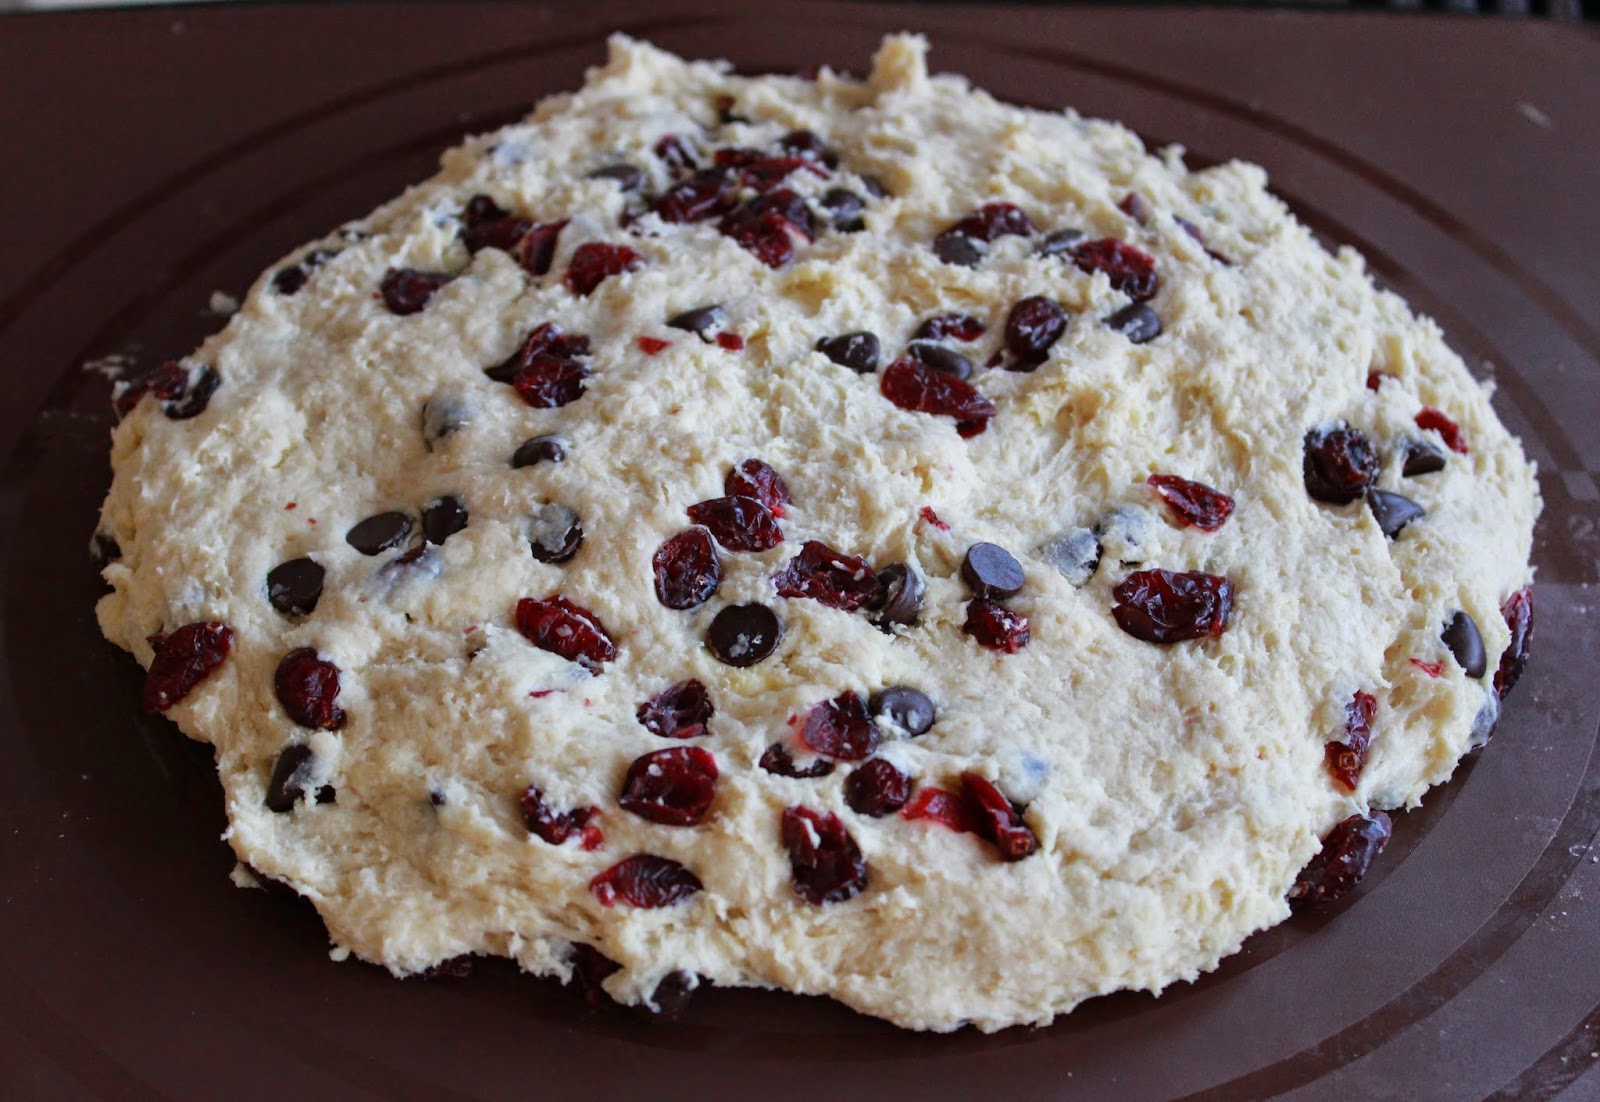
Fold in the chocolate chips and cranberries, and lightly knead in the bowl.

Turn out onto a lined oven tray and form into a circle shape.


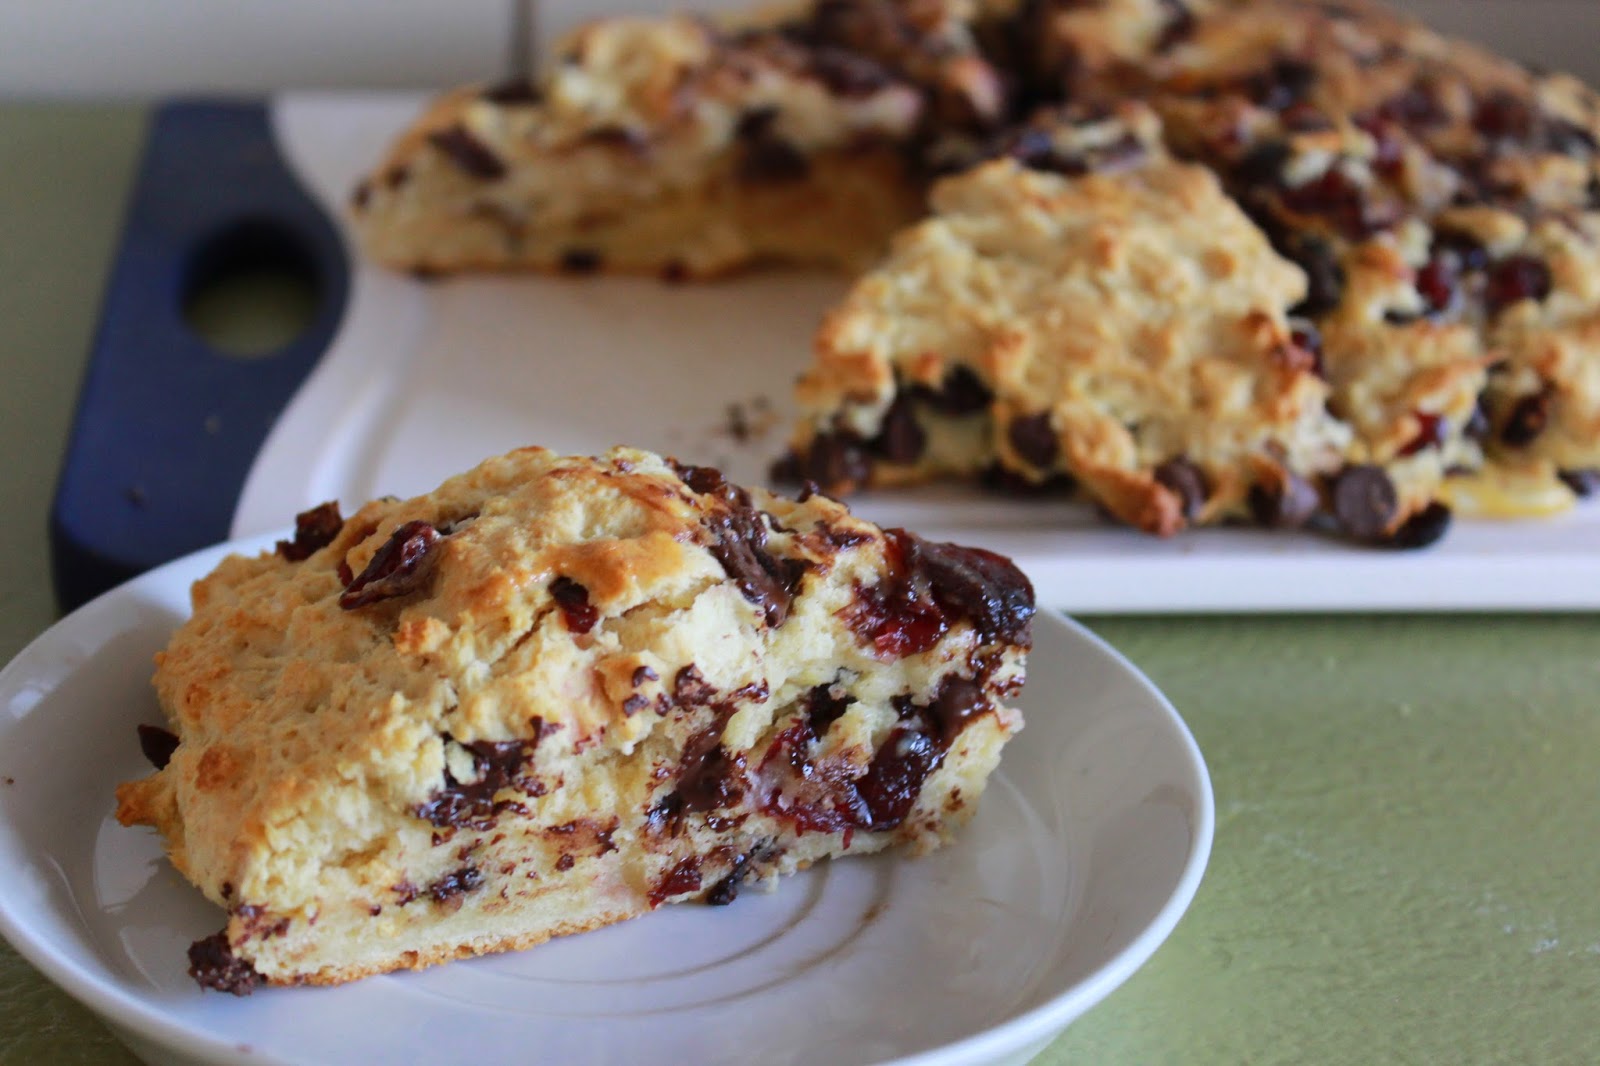
Bake in the oven for 15 minutes or until golden brown on top. Cut into wedges and serve.


Simple and delicious!

Wednesday, September 3, 2014

What's Cooking Wednesday #22

Some people have been asking for the recipe for my Lamington Cake, so today is your lucky day!


Raspberry Lamington Cake
adapted from Real magazine

You will need:
2 x 20cm ready made sponge cakes
1 85g packet raspberry jelly
250g dessicated coconut
300ml bottle cream, whipped
3 tablespoons rasberry jam
1 1/2 cups thawed frozen raspberries, pureed with a stick blender or food processor

Put the jelly crystals in a bowl; pour over 1 cup of boiling water and stir to dissolve. Add the raspberry puree and mix well. Leave jelly to cool, cover and place in the fridge for about 45 minutes until the jelly begins to thicken and become the consistency of raw egg white.

Place a sheet of baking paper on top of two wire racks and put the sponge cakes on top. Spoon the setting jelly over the cakes, covering them evenly.

Sprinkle coconut over the top of the cake and press into the sides of the cake.

Swirl the raspberry jam through the cream. Place the cake on a serving plate, uncovered side upwards, and spread the raspberry cream on top then place the second cake on top. Decorate with extra coconut and raspberries.

The verdict: One happy birthday boy!


This cake was visually appealing, easy to assemble and it tasted great! I can't wait to make a chocolate version.

Wednesday, August 27, 2014

What's Cooking Wednesday #21

I know I have already shared my delicous Lemon and Blueberry Muffins, but I can never get enough of muffins! They can be a wholesome snack, breakfast or part of a lunchbox, and they freeze well.

My Simply Heaven Chocolate recipe book is coming back to feature this week, with the combination of blueberry and white chocolate coming together to provide a moist and tasty muffin.

Blueberry, White Chocolate and Coconut Muffins
adapted from Simply Heaven Chocolate

1 cup self raising flour
1 cup wholemeal flour
2 teaspoons baking powder
3/4 cup castor sugar
1/3 cup dessicated coconut
125g white cooking chocolate, chopped
125g blueberries
Finely grated rind of 1 lemon
3/4 cup milk
1/2 cup vegetable oil
2 eggs

Combine the first 8 ingredients in a large bowl.

Whisk together the milk, oil and eggs, and fold into the dry ingredients until just combined.

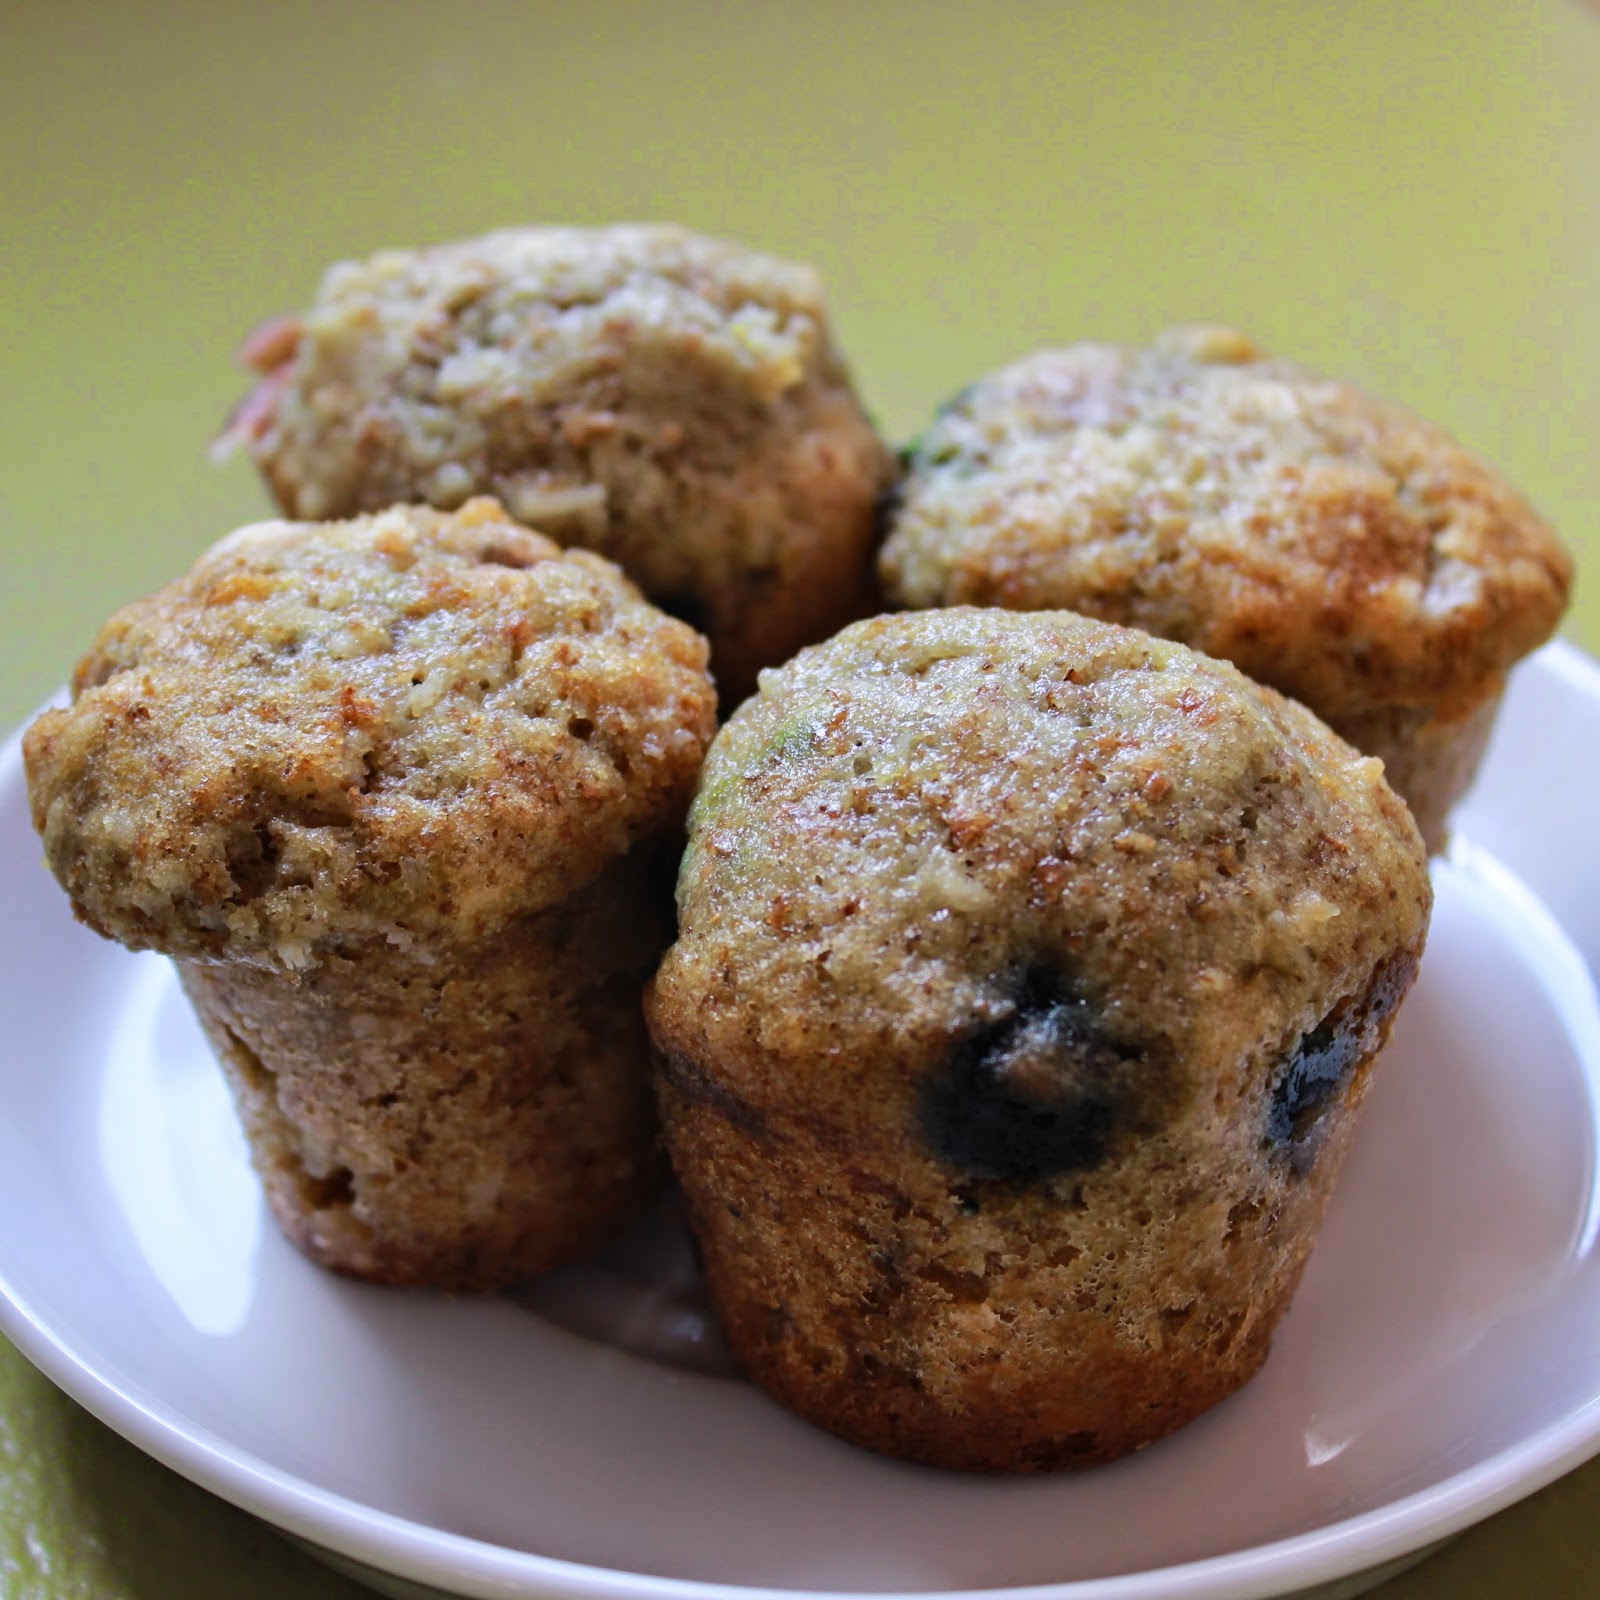
Spoon the mixture into greased muffin tins and bake at 190 degrees C for 15-18 minutes until golden and set. Stand for 10 minutes before removing to a wire rack. Cool then serve.

These can be frozen for up to three months, or will last 3-4 days in an airtight container.


The verdict: I got so many compliments on how good these muffins were, that I will be making another batch this week already! The coconut stops the muffins from being too sweet, and the white chocolate gives a gooey, caramel taste to the muffin.

Wednesday, August 20, 2014

What's Cooking Wednesday #20

Time for another chocolate-based item, as who doesn't like chocolate?

I turned to my trusty Simply Heaven Chocolate recipe book and decided to try out a kitchen gadget I got for Christmas- a macaron mat and kit. These are delicious little mouthfuls of happiness and I was a bit nervous to make them myself, but I figured the kit would be able to help me.

Milk and White Chocolate Macarons
(adapted from Simply Heaven Chocolate)
Macarons:
1 1/2 cups icing sugar
1/2 cup blanched almonds
1/4 cup cocoa
3 egg whites, at room temperature
1/4 teaspoon salt
1/4 cup caster sugar

Filling:
80g white chocolate melts
30g unsalted butter
100g cream cheese
1/3 cup icing sugar, sifted

Combine the icing sugar, almonds and cocoa in a food processor and process until super fine. Sift and remove any coarse pieces of almond.

Beat the egg whites and salt until soft peaks form. Continue beating, gradually adding the sugar until dissolved.

Fold the almond mixture into the egg whites until just combined. Pipe onto tray then stand at room temperature for 30 minutes until the macarons form a light crust.

Bake at 150 degrees C for 22-28 minutes or until firm to the touch. Allow to cool on the trays.

To make the filling, combine the chocolate and butter and melt in the microwave or over a pan of simmering water. Remove from the heat and cool slightly. Beat together the cream cheese and extra icing sugar then beat into the chocolate mixture. Chill until firm enough to spread.

To assemble, spread chocolate filling on to half of the macarons and top with the remaining halves, pressing together gently.

The kit came with a piping squeeze container and a silicone baking sheet that had circles for guides on it. I was not sure which guide to use as there were two circles, so I did some to the larger circle and some only filling the smaller circle.


When they had cooked, I discovered that I needed to pipe to the outer circle- Now that I know that, my next batch will be more even. I was very pleased with the biscuits themselves though.


I sandwiched them together with filling and they were the perfect size to accompany a cup of coffee.


The verdict- Time consuming but delicious! I am happy to make these again as a lot of time was waiting for them to form a skin, then waiting for them to cool.

Friday, August 1, 2014

How I Meal Plan

To help keep my sanity in check, I try to go with a different meal theme each day so that I have some kind of routine. Here is my general guide to how I meal plan- with a little help from a fantastic website.


Our week usually looks like this.

Monday: Meatless Dish
Tuesday: Fish Dish
Wednesday: Chicken Dish
Thursday: Crock-Pot
Friday: Family Fun Night (with a themed menu and activity)
Saturday: Pasta Dish
Sunday: Family Favourites

On Sunday, we also have a special family breakfast together- usually scrambled eggs or pancakes as the kids can help to cook them but I am looking to change this up a bit so we have other options. What do you like to have for a family breakfast that young children can help to prepare? I need some new ideas!

Most weekends I also bake for the week ahead, and I also bake something for preschool on a Wednesday.

A lot of our Friday and Sunday night meals are red meat based, in case you were wondering, and we also have a few red meat favourites for the Crock Pot.

For example, this week the plan is:

Monday: Cheesy Leek Risotto
Tuesday: Thai Curried Fish with Spiced Rice and corn kernels
Wednesday: Chinese Lemon Chicken with rice and broccoli
Thursday: Slow Cooker Beef Stroganoff
Friday: Swedish Meatballs with Miss Piggy Cupcakes (Muppets Movie night)
Saturday: Creamy Cajun Shrimp Pasta with Cajun steamed vegetables
Sunday: Sausage Hash Brown Bake

For baking, I made Peanut Butter Banana Swirl Bread and Oddfellow Roll.

How do I keep track of my meal plan and shopping list? I use a website called Plan To Eat.

Simple Meal Planning - Plan to Eat

You can import recipes from the internet or type out your own favourites, then drag them into a weekly or monthly planner. This automatically creates a shopping list for you, which you can edit if you already have the necessary ingredients. I love that you can adjust the list- for example, I have mine done by aisles so I am efficient when I go to the store, but you can have it done by categories such as produce, meat, dairy etc or make the shopping list into whatever subcategories you choose. You can also have categories for your recipes, so I have separated mine by the themes listed above. The other thing I like about Plan To Eat is that you can also have a staples grocery list for things you buy every time you go shopping, and have them separate or merge them into your planned shopping list.

We usually eat the same things for breakfasts and lunches as well as snacks, so I have put them into my staples grocery list and also made them into meals on my Plan To eat menu, with labels such as preschool Lunch and snack options, to effortlessly migrate those items such as yoghurt, fruit and muesli bars to my shopping list.

Finally, to stop everyone asking "what's for dinner?", I write up the weekly menu on my new Magnetic Chalkboard, which was released today! (I got to play with it a couple of weeks in advance, and I love how it looks in my kitchen. Plus I can put memos, notices and receipts on there too.


I hope this helps you to do some meal planning too, this method certainly takes the stress out of feeding my family each week.

NB: I was not reimbursed in any way for my Plan To Eat review, it is just the method that I use and love!

Wednesday, July 23, 2014

What's Cooking Wednesday #19

I don't know what I would do without my slow cooker- it is such an amazing kitchen appliance!

My plan of making post-it-note marked recipes form my recipe books is coming along nicely, and this week I pulled out Best Recipes for Slow Cookers and Crockpots by Robyn Martin. This book is full of outstanding slow cooker recipes, and as well as your traditional stews and soups there are pie fillings, curries and cakes. So many recipes I want to try!


The recipe I chose this week was the Cajun Chicken Wraps- modified for children to be less spicy.

Cajun Chicken Wraps
adapted from Best recipes for Slow Cookers and Crockpots

1 teaspoon Cajun seasoning
1 packet Maggi Onion Soup mix
1/2 cup water
1 carrot
6 skinless, boneless chicken thighs
1/4 cup unsalted roasted peanuts
1/4 cup natural unsweetened yoghurt
4 flour tortillas

Mix Cajun seasoning, soup mix and water together.

Peel the carrot and grate finely.

Trim any fat from chicken and cut into 2cm strips.

Place soup mixture, carrots and chicken in the slow cooker with the peanuts and cook on LOW for 6-8 hours.

Half an hour before the end of cooking, mix in the yoghurt.

When ready to serve, warm the tortillas and place the chicken mixture down the centre of each tortilla. Fold bottom of tortilla over chicken and wrap around to enclose filling.


The verdict- This turned out to be quite a mild mix- it was almost more of a Satay Wrap. My four year old announced that the chicken was "40,000 delicious" and he hardly ever likes chicken dishes, so this was a big breakthrough! The wholegrain wraps I used were also a great tasting option, and the carrot snuck in an extra serve of veggies for the kids. Overall, I would make these again but probably add some more spice to the mixture.

Linking up with Wake Up Wednesdays.
Wake Up Wednesdays

Wednesday, June 25, 2014

What's Cooking Wednesday #15

I love a curry, and I love pumpkin. I would like to share with you today a recipe I made for dinner a few weeks ago that combines all of my favourite winter comfort foods.

Roast Pumpkin and Cashew Chicken Curry
Serves 2 adults and 2 children

1/4 cup raw cashew nuts
1/2 crown pumpkin
400g chicken breasts
200ml coconut milk
2 tablespoons garlic infused olive oil
1/2 teaspoon salt
1 1/2 teaspoons curry powder
1/2 teaspoon minced coriander
10 grinds fresh black pepper
1 teaspoon ground flaxseed (optional)
cooked rice, to serve

Soak the cashew nuts for at least one hour in boiling water then drain.

Chop the pumpkin into wedges and season liberally with salt and pepper. Spray with oil and bake in an oven at 180 degrees C for 30-45 minutes until the pumpkin is golden and cooked through.

While the pumpkin is cooking, prepare your rice. I always use a rice cooker but the usual method you use for cooking rice is fine.

Once the pumpkin has roasted, leave to cool and then mash with a fork.

Chop the chicken breast into strips. Place in a frypan with some more oil spray and brown. Add the
pumpkin mash and coconut milk.

Place the soaked cashews, coriander, curry, flaxseed, salt and black pepper in a food processor. Pulse several times to break down the cashews then drizzle the oil in and pulse until smooth. The flaxseed is optional- I pulse it into the curry mix for some added fibre. Mix into the pan with the coconut milk, chicken and pumpkin, and add 1/4 cup hot water. This curry mix is delicious with anything by the way!

Leave this mix to boil for 5 minutes, then serve over rice.


You seriously have to try this- the coriander and pumpkin go together so well, and the flavours are divine. Perfect comfort food on a cold winter's evening. My husband even said this was the top dish I have ever made!


Linking up with Wake Up Wednesdays.

Wake Up Wednesdays
Related Posts Plugin for WordPress, Blogger...