Showing posts with label chocolate. Show all posts

Wednesday, November 30, 2016

WCW- White Chocolate and Salted Caramel Mousse


Sometimes you need a delicious dessert that you can make, leave in the fridge, and then serve and still feel like a domestic goddess. This recipe does it for me!

A white chocolate mousse with salted caramel and buttermilk undertones- this dessert is guaranteed compliments but it is deceivingly easy.

Sugar, cream, eggs and white chocolate make the basis of this recipe, and my two special ingredients of Whittaker's West Coast Buttermilk Caramelised White Chocolate and Dollop Salted Caramel Sauce take this dessert to the next level.


After beating the eggs and sugar, melted white chocolate and whipped cream is folded in to create a light and fluffy mousse.


The magic happens when you drizzle salted caramel sauce on top of the mousse, then add shavings and squares of the buttermilk chocolate.


This mousse is all about decadence! Perfect for potlucks and this will definitely be on my table for Christmas Day dessert.


print recipe

White Chocolate and Salted Caramel Mousse
Ingredients
  • 400 grams white chocolate melts
  • 4 large eggs
  • 1/2 cup caster sugar
  • 600ml cream
  • 1 bottle Dollop Salted Caramel Sauce
  • 1/2 block Whittaker's Buttermilk White Chocolate
Instructions
Place the chocolate in a heatproof bowl and melt, then set aside to cool. Beat the eggs and sugar together with a hand held electric mixer until thick and pale and the sugar has dissolved. Fold through the cooled melted white chocolate until well combined. Whisk the cream in a seperate bowl until slightly thick and soft peaks form. Fold gently into the mousse. Place the mousse in a serving bow, cover with plastic wrap and refrigerate for 1-2 hours. Serve with salted caramel sauce poured over top and sprinkle with chopped chocolate.
Details
Prep time: Cook time: Total time:

Wednesday, August 3, 2016

WCW- Chocolate Chunk Scones


Everyone loves a good scone recipe, and chocolate is always popular! These Chocolate Chunk scones are very decedent and deliver a mouthful of chocolate in each bite.

The ingedients should already be in your baking cupboard- unless you are like me and use cooking chocolate as a late night snack!


It doesn't take long to mix the dry ingredients together, then add the butter and form a dough with the other ingredients.


I take the lazy way with scones and cook them as a whole round, then slice into wedges when cool.


Mmmm, look at all of this chocolate!


print recipe

Chocolate Chunk Scones
Ingredients
  • 1/4 cup white sugar
  • 2 1/2 cups plain flour
  • 1/2 teaspoon salt
  • 2 teaspoons baking powder
  • 3/4 cup full fat milk
  • 2 eggs
  • 2 teaspoons vanilla essence
  • 200g dark chocolate block
  • 4 tablespoons full fat milk
  • 3 tablespoons castor sugar
  • 6 tablespoons cold unsalted butter, cubed
Instructions
Preheat the oven to 180 degrees C and prepare a large baking tray. Whisk together the sugar, flour, salt and baking powder. Add the cubed butter and work into the flour mixture until crumbly.Transfer the dough to a floured surface and shape it into an 8 inch circle. Place on the baking tray and brush the top with milk, then sprinkle the castor sugar over the top.Cook for 20 minutes, then cut into 12 wedges and serve.
Details
Prep time: Cook time: Total time: Yield: 12 scones

Wednesday, April 20, 2016

WCW- Gluten Free Chocolate Peppermint Slice


Hi fellow foodies! This week I am starting to share my recipes with you as a printable format, so I would love your feedback on the new feature.

This gluten free Chocolate Peppermint Slice is a delicious alternative for those who cannot have a traditional biscuit base. however, it tastes so good that no-one will know it is gluten free!

Please make sure your cocoa powder, cooking chocolate and icing sugar are gluten free varieties. The biscuits I use for this base are Leda Arrowroot Biscuits.

You start by melting the butter and sweetened condensed milk together, then adding the other ingredients apart from the cooking chocolate and pressing this into a slice tray. Refrigerate for at east two hours. This base is very dark, rich and fudgy.


When it is set pour the chocolate over top and place in the fridge for a further hour.


Look at how rich and gooey this slice is!


This slice is great for a 3pm pick-me-up with a coffee, or a decedent after dinner treat.


print recipe

Gluten Free Chocolate Peppermint Slice
A gluten free fudgy treat!
Ingredients
  • 100 grams butter
  • 3/4 cup sweetened condensed milk
  • 205 grams gluten free plain biscuits, crushed
  • 1 cup coconut
  • 1/4 cup cocoa
  • 1/2 cup icing sugar
  • 1 teaspoon vanilla essence
  • 1/2 teaspoon peppermint extract
  • 200 grams dark cooking chocolate
Instructions
Melt the butter and sweetened condensed milk together in the microwave for 2 minutes until thickened and bubbly.Add the crushed biscuits, coconut, cocoa icing sugar and essences to the melted butter mixture.Press into a pan and leave in the fridge to set for at least two hours.Melt the cooking chocolate and pour over the slice. Refrigerate for a further hour then cut into 16 pieces.
Details
Prep time: Cook time: Total time: Yield: 16 pieces

Wednesday, December 30, 2015

Cappuccino Choc Cherry Brownie


I love coffee, and as well as drinking it I also enjoy experimenting with coffee baked goods. Here is a recipe I developed recently as part of a Nescafe Dolce Gusto Christmas competition, where I had to create a baked treat featuring Nescafe Dolce Gusto coffee pods.

Cappuccino Choc Cherry Brownie

1 Nescafe Skinny Cappuccino pod, made according to directions
50g butter
1/2 cup cocoa
2 cups castor sugar
1/4 teaspoon salt
3 eggs
1 teaspoon vanilla essence
1 cup flour
1/2 teaspoon baking powder
1 cup chocolate chips
1 cup glace red cherries, halved

Preheat oven to 150 degrees C. Spray an 8x8 baking tin with non-stick spray or line with grease proof paper.

Pour the cappuccino into a large bowl and add the butter, then melt in the microwave for one minute until the butter has melted. Mix in the cocoa, sugar, salt, eggs and vanilla essence until well combined..

Gently mix in the flour, baking powder, chocolate chips and cherries.

Pour into the prepared tin and bake for one hour.


The brownie should still be quite soft in the middle, but will have cracked slightly and pulled away from the edge of the tin.Cool completely in the tin, then cut and store in an airtight container.

Best served with a coffee on the side!

Wednesday, October 14, 2015

WCW Caramello Peanut Truffles


      Sometimes you have those recipes that turn into a disaster, and yet sometimes they turn into something salvageable and amazing! This is what happened to me with this recipe- I originally tried to make a slice but it crumbled as I was cutting it so I made it into truffles, and they were delicious. I have streamlined this recipe for you to try at home without the slice disaster step!

      Caramello Peanut Truffles

      250g block Caramello Chocolate, melted
      115g butter, melted
      200g Marie biscuits or other plan vanilla biscuits
      3/4 cup sweetened condensed milk
      1/4 cup coconut flakes
      1/4 cup chopped roasted peanuts
      200g milk chocolate melts
      1/2 tub Cheesecake Filling

      Melt the butter and Caramello chocolate together with the sweetened condensed milk in a microwave safe jug.

      Crush the biscuits and combine with butter mixture, coconut flakes and peanuts.

      Spread into a baking tray and allow to cool.

      Melt the milk chocolate and pour over the biscuits. Leave to set in the fridge for at least two hours until the chocolate is hard.

      Crush the base and chocolate layer in a food processor or by hand in a Ziploc bag, then mix with the cheesecake filling into balls. Leave to set in the fridge for at least two hours, then enjoy!


      You get bites of hard chocolate, peanuts and softer cheesecake filling in every bite. One is not enough with these truffles- deliciously decadent and great for entertaining!
      

      Wednesday, September 2, 2015

      WCW Rocky Road Slice


      One of my favourite flavours is Rocky Road, but unfortunately my children don't like jelly lollies as much as I do! We have compromised and come up with this Rocky Road Slice, that mixes marshmallows with cherries and chocolate for a decadent treat.

      Rocky Road Slice

      225g chocolate wheaten biscuits
      125g butter
      2 tablespoons golden syrup
      1 tablespoon cocoa powder
      225g milk chocolate melts
      75g glace cherries, halved
      100g mini baking marshmallows

      Place the biscuits in a ziplock bag and crush with a rolling pin.

      Melt the butter, golden syrup and cocoa powder in a saucepan over medium heat and gently stir until combined.

      Remove the saucepan from heat and stir in the chocolate biscuits, then pour into a lined and greased baking tray.

      Melt the chocolate and then add the cherries and marshmallows. Pour over the biscuit base and spread over evenly. Chill for three hours in the fridge then cut into slices to serve.


      You only need a small piece of this to get that chocolate hit, and this slice lasts well in the fridge for up to a week. The soft textures of the topping compared with the hard biscuit base make this popular with both adults and kids!

      Wednesday, May 13, 2015

      WCW Cameo Slice


      One of my favourite treat biscuit is Cameo Cremes- a delicious chocolate biscuit with a creamy centre. I needed a quick slice a few weeks ago, and had a packet of these biscuits in the fridge, and so Cameo Slice was created!

      Cameo Slice
      1 packet Cameo Creme biscuits, coarsely crushed
      1/2 can sweetened condensed milk
      1/4 cup butter
      4 tablespoons brown sugar
      1/2 cup raisins

      for the icing:
      1 cup icing sugar
      2 tablespoons cocoa powder

      In a saucepan or microwave jug, heat the butter, sweetened condensed milk and brown sugar until butter is melted and sugar has dissolved. Mix in the biscuits and raisins. Press into a slice form and refrigerate for two hours.

      Mix together the icing ingredients and spread over the base. Let cool then cut into slices.


      This is like having a Cameo Creme biscuit with added deliciousness! The raisins stop it from being too sweet, and the texture is firm but easy to eat. I have made this a few times and each time it has been easy, yummy and eaten far too quickly!

      Wednesday, March 11, 2015

      WCW One Bowl Chocolate Chip Banana Muffins


      My husband is a big fan of the standard chocolate chip banana muffin, and so I wanted to make a healthier option for lunchboxes during the week. I came up with this recipe as I was trying to make muffins and cook dinner at the same time, and I wanted something quick and easy. This recipe only uses one bowl, no fussy measurements, and healthier options.

      One Bowl Chocolate Chip Banana Muffins
      3/4 cup white sugar
      1/2 cup butter, melted
      2 eggs
      2 bananas, mashed
      1/2 cup Greek yoghurt
      1/2 teaspoon vanilla essence
      1 1/2 cups wholemeal flour
      1 teaspoon baking soda
      1/4 teaspoon salt
      1/4 teaspoon baking powder
      1/2 cup chocolate chips

      Preheat the oven to 180 degrees C. Prepare a 12 cup muffin tray with spray or liners.

      In a bowl, beat together the butter and sugar until creamy. Beat the eggs in, one at a time, then add the bananas, yoghurt and vanilla. Sift in the flour, baking soda, salt and baking powder, and mix to just combine. Fold in the chocolate chips.

      Bake in the preheated oven for 20-25 minutes until the muffins are golden and cooked through. Leave to cool for 5 minutes before turning out on a wire rack.


      These muffins are moist, delicious and decadent, and my muffin-mad husband gave these two thumbs up.

      Wednesday, December 3, 2014

      Winter Wonderland Choc Peppermint Cake

      I know a lot of my readers celebrate Christmas during winter, so today I have the perfect recipe for you!

      This chocolate cake is light and fluffy, with a hint of peppermint and a rich chocolate glaze. The addition of snowflake sprinkles make this the perfect Christmas showstopper cake, or you can substitute any other type of Christmas sprinkles. If you are in the Southern Hemisphere like me, you could use a mixture of red and green sprinkles instead of snowflakes.

      You will need:
      • 3/4 cup butter
      • 3 eggs
      • 1 3/4 cups  all-purpose flour
      • 1/3 cup milk powder
      • 1 teaspoon baking soda
      • 1/2 teaspoon salt
      • 2/3 cup dark cooking chocolate, chopped
      • 1 cup white sugar
      • 3/4 cup packed brown sugar
      • 1 1/2 teaspoons peppermint essence
      • 1 1/4 cups water
      • 1 tablespoon milk powder
      • 2 tablespoons boiling water
      • 3/4 cup dark cooking chocolate, chopped
      • 1/3 cup butter, cut up
      • 1 tablespoon light-color corn syrup
      • Christmas sprinkles to decorate
      1. Allow 3/4 cup butter and eggs to stand at room temperature for 30 minutes. Meanwhile, in a medium bowl stir together flour, 1/3 cup milk powder, baking soda, and salt. Set aside.
      2. In a small microwave-safe bowl microwave chocolate in 30 second bursts until melted. Cool slightly.
      3. Preheat oven to 325 degrees F. In a large mixing bowl beat 3/4 cup butter with both sugars until well combined, Add eggs, one at a time, beating well after each addition. Beat in melted chocolate and peppermint essence. 
      4. Alternately add flour mixture and 1 1/4 cups water to chocolate mixture, beating on low speed after each addition just until combined. Pour batter into a bundt cake pan, spreading evenly.
      5. Bake for 55 to 60 minutes or until a wooden toothpick inserted near the center comes out clean. Cool in pan on a wire rack for 15 minutes. Remove cake from pan; cool completely on wire rack.
      6. Meanwhile, for glaze, stir together 1 tablespoon milk powder and the boiling water until milk powder is dissolved. Add the 3/4 cup chocolate, 1/3 cup butter, and corn syrup. Mincrowave on medium power for one minute until melted and smooth. Cover and chill for 30 to 40 minutes or until glaze is slightly thickened, stirring occasionally.
      7. Drizzle glaze over cake. Top with sprinkles and serve.
      As you can see, the cake was very popular!


      Linking up with Fall Into the Holidays and Wow Me Wednesday.

      Monday, November 24, 2014

      To The Kitchen!

      Welcome back to another installment of the Poppins Book Nook!


      This month's theme is To The Kitchen!


      My boys both love baking and helping in the kitchen, so we focused on a couple of great kid's cooking books this month. The two that we loved were Chop Chop- The Kid's Guide to Cooking Real Food with Your Family and Ready, Steady Spaghetti. We chose both these books as they had great step-by-step photo instructions, were visually appealing and also both had comprehensive safety, healthy eating and recipe sections.

      As well as being in the kitchen to cook, we also focused on science experiments this month using things you will find in the kitchen.

      The first thing we did was create a water symphony. I filled three glasses with different amounts of water and the boys had fun hitting the glass with a wooden spoon and making different sounds.


      A fun dessert was a Spider- we added a scoop of icecream to lemonade and watched it fizz up!


      Lucas is a big fan of EvanTubed, so we replicated the Balloon experiment that he featured on YouTube.


      It was so much fun to see the boy's faces light up as the balloon got bigger and bigger. A great science lesson that even the littlest family members can appreciate.


      Of course, we also had to make something edible in the kitchen. We chose a simple recipe for Crunchy Nut Cornflake Slice out of the recipe book, as both my boys love breakfast cereal, peanut butter and chocolate. Lucas was a champ at measuring out the ingredients, and Adam enjoyed stirring everything together.


      Here is a photo of the finished product- we will be sharing the full recipe on Wednesday so be sure to come back if you would like to make your own version of this slice!


      We also made a New Zealand staple- Hokey Pokey. This involves heating 5 tablespoons of sugar with 2 tablespoons of golden syrup in a small pan. You then add 1 teaspoon of baking soda.


      This puffs up and creates a golden candy.


      Allow to set, and then break into pieces.


      Both boys enjoyed trying the Hokey Pokey.


      I put the boys in charge of choosing a recipe and making dinner on Monday night, and they chose the Cheese and Bean empanadas. Both boys did a great job mixing the ingredients and forming them into empanadas using our special cutter.


      They looked great and tasted delicious- I was so proud of my boys for making these.


      We had a great time using kitchen items to experiment, cook, bake and create dessert. Click below to see how other members of Poppins Book Nook were inspired!

       Clip art by MelonHeadz.


      Enchanted Homeschooling Mom ~ 3 Dinosaurs ~ To the Moon and Back ~ Planet Smarty Pants ~ Farm Fresh Adventures ~ Growing in God's Grace ~ Chestnut Grove Academy ~ Learning and Growing the Piwi Way ~ The Usual MayhemPreschool Powol Packets ~ Monsters Ed Homeschool Academy ~ Adventures in Mommydom ~ Teach Beside Me ~ Life with Moore Babies Kathy's Cluttered Mind ~ Are We There Yet? ~ Our Crafts N Things ~ Hopkins Homeschool ~ ABC Creative Learning ~ Joy Focused Learning ~ P is for Preschooler ~ Laugh and Learn ~ A Mommy's Adventures ~ Inspiring 2 New Hampshire Children ~ World for Learning ~ Ever After in the Woods ~ Golden Grasses ~ A glimpse of our life ~ Journey to Excellence ~ Happy Little Homemaker ~ Little Homeschool Blessings ~ Raventhreads ~ Tots and Me As We Walk Along The Road ~ Stir the Wonder ~ For This Season ~ Where Imagination Grows ~ Lextin Academy ~ The Canadian Homeschooler ~ School Time Snippets ~ Peakle Pie ~ A Moment in our World ~ Every Bed of Roses ~ Finchnwren ~ At Home Where Life Happens ~ The Library Adventure ~ Embracing Destiny ~ Day by Day in our World ~ Our Homeschool Studio ~ A "Peace" of Mind ~ Thou Shall Not Whine ~ SAHM I am ~ eLeMeNo-P Kids ~ Simple Living Mama


      Wednesday, October 1, 2014

      What's Cooking Wednesday- Lazy Girl Scones

      I like to have fresh baking in the tins when I have unexpected visitors, but sometimes my tins are empty and I get a text that my friend is coming over in half an hour.

      This scone recipe is what I call my "Lazy Girl" scones- they take 10 minutes to whip up, then 15 minutes in the oven, then they are ready to eat!

      You will need:
      3 cups plain flour
      4 teaspoons baking powder
      1/4 teaspoon salt
      50g butter, cubed
      1 1/4 cups milk
      1/2 cup chocolate chips
      1/2 cup dried cranberries

      Preheat the oven to 220 degrees C

      Sift together the flour, baking powder and salt.

      Add the butter and run into the mix until it resembles breadcrumbs. Add milk and mix to a soft dough.

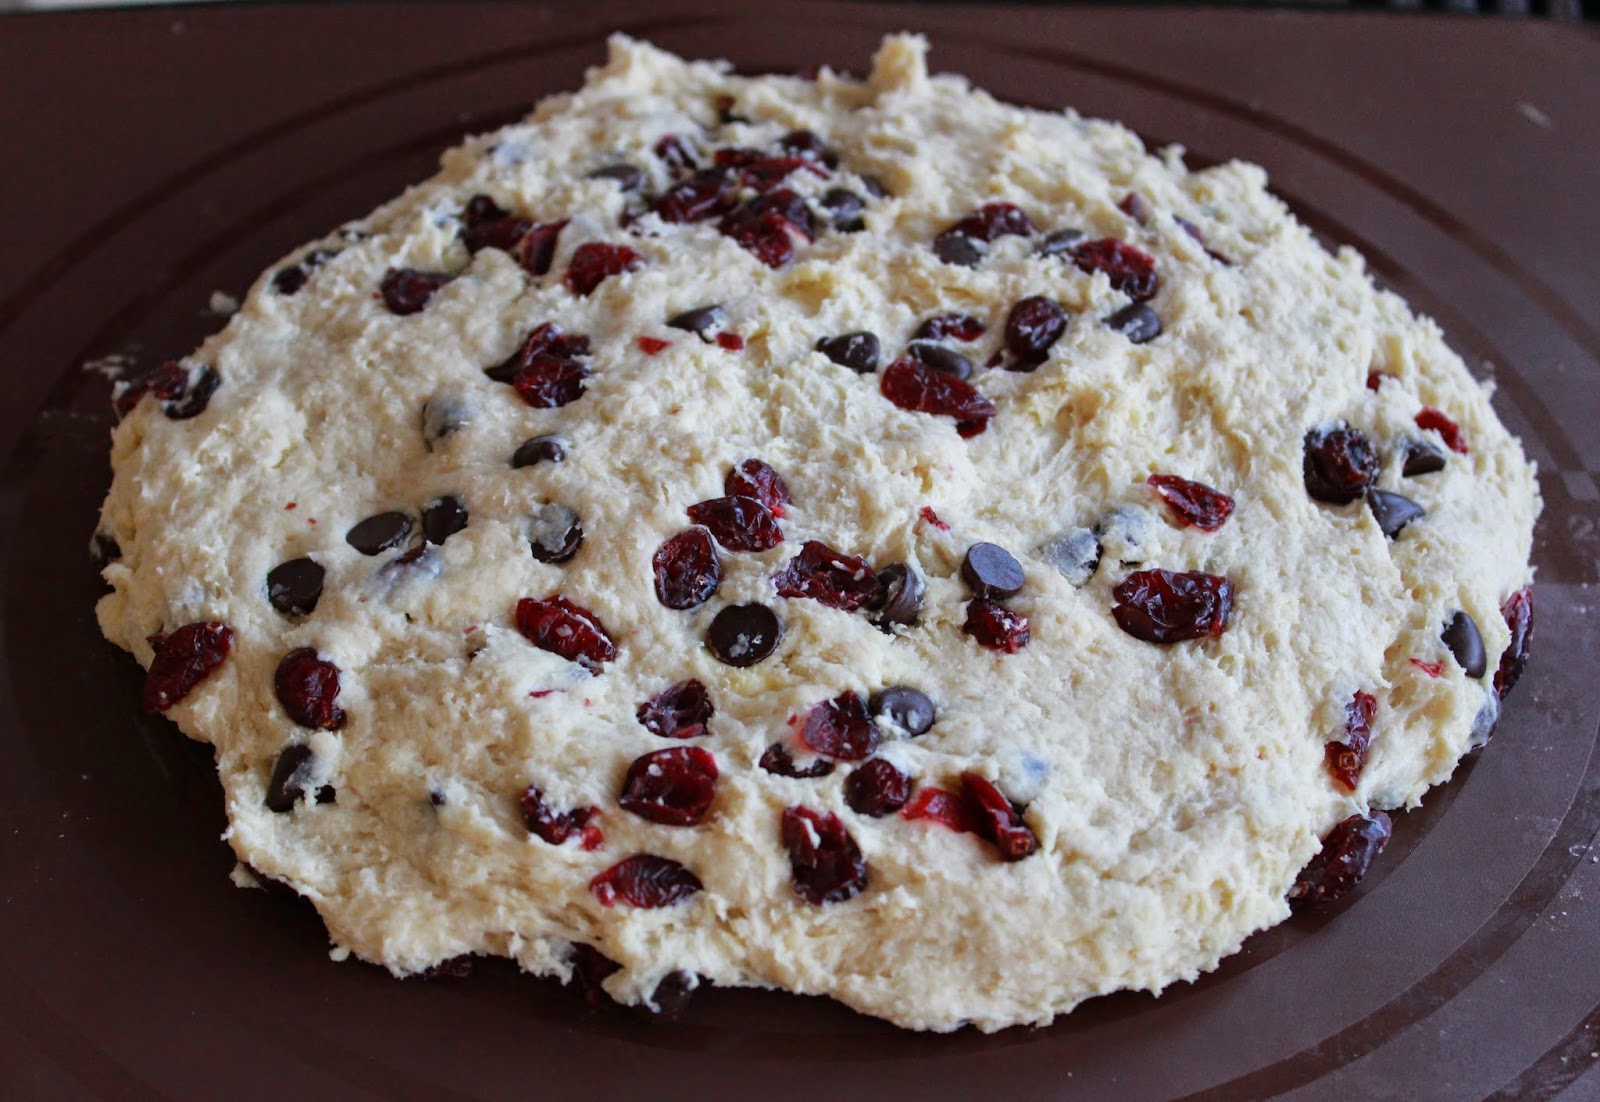
      Fold in the chocolate chips and cranberries, and lightly knead in the bowl.

      Turn out onto a lined oven tray and form into a circle shape.


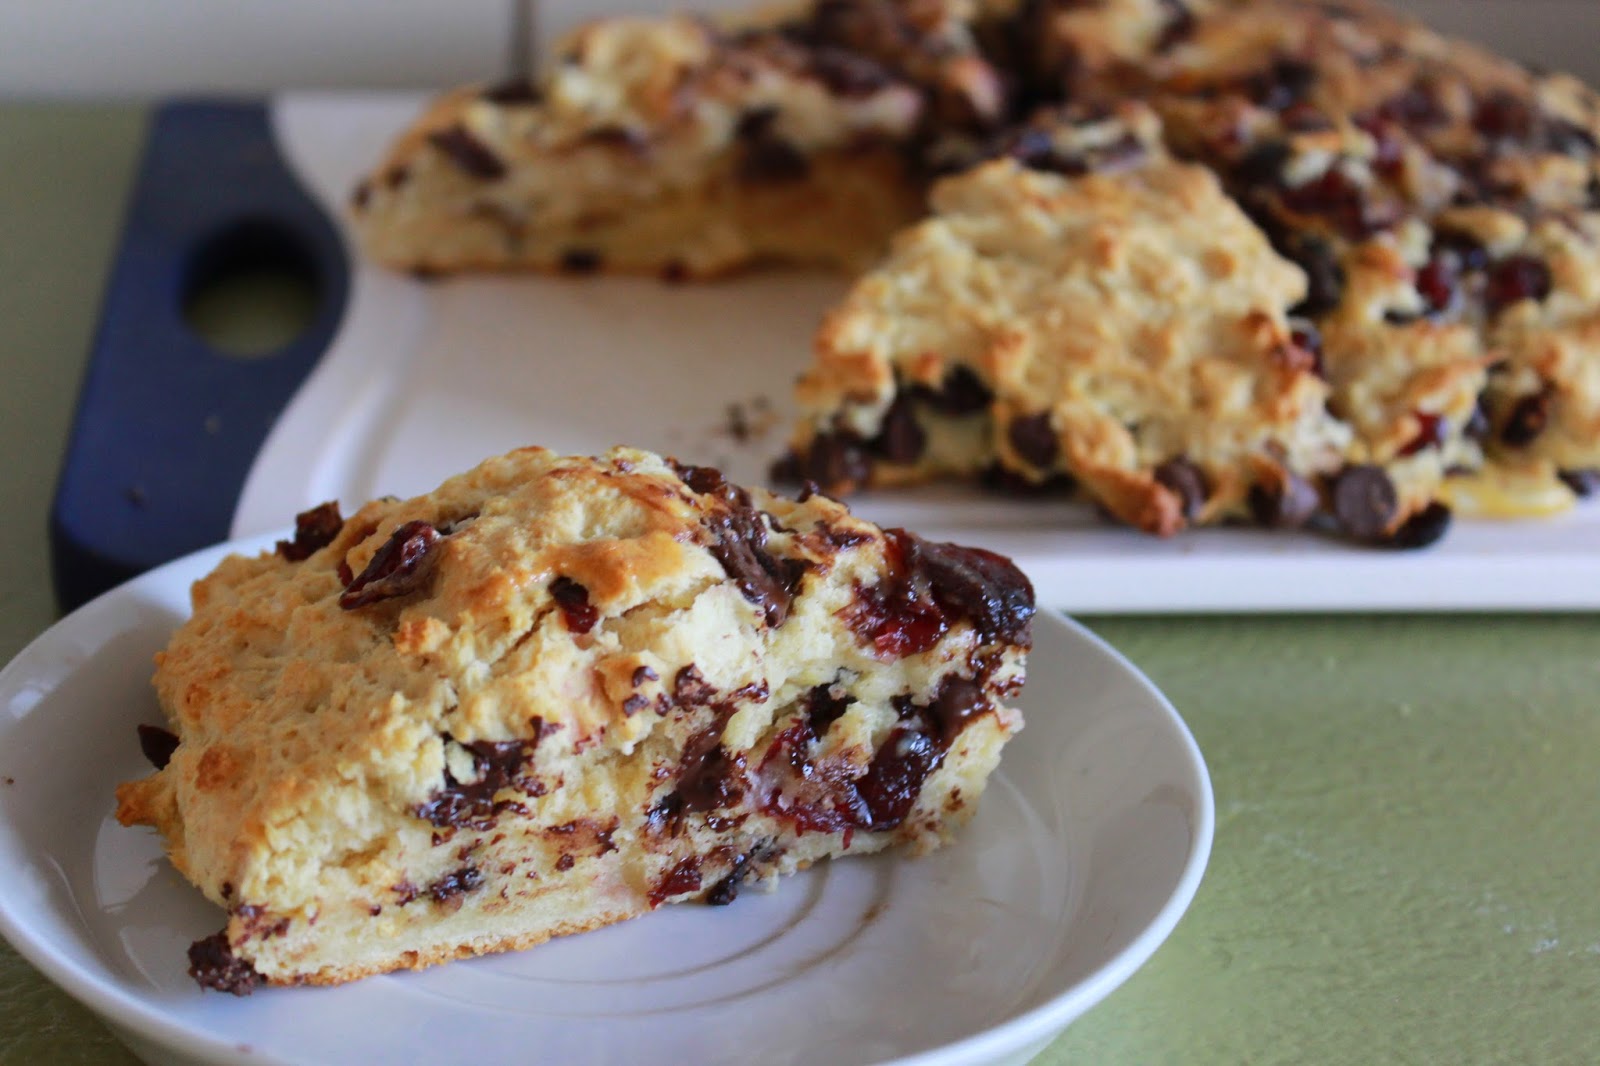
      Bake in the oven for 15 minutes or until golden brown on top. Cut into wedges and serve.


      Simple and delicious!
      Related Posts Plugin for WordPress, Blogger...