Wednesday, January 4, 2012

Tasty Tuesdays- Beef Parmesan with Fettucine and Balsamic Parmesan Asparagus

As part of one of my resolutions for 2012, I am participating in Tasty Tuesdays, a great idea from a fellow blogger. Every Tuesday (although it will probably be early Wednesday here as the blog like is American) I will post a different recipe and link up to a lot of other recipes posted by other food bloggers. I have gotten some great recipe ideas from some of these links and I hope you will too!

All the recipes can be found here: http://33shadesofgreen.blogspot.com/2012/01/tasty-tuesdays-cranberry-ginger-fizz.html


This is one of the go-to family meals I love to make, adapted from Allrecipes to suit my low FODMAP lifestyle. Best of all, it only takes 40 minutes to prepare from start to finish, and you have a perfectly good meal incorporating meat, veggies and carbohydrate.

Beef Parmesan with Fettucine and Balsamic Parmesan Asparagus. Serves 2 (plus a toddler!)


  • 2 tenderised beef steaks


  • 1 green bell pepper


  • 1/2 cup bread crumbs


  • 1 tablespoon mixed herbs


  • 1/4 cup grated Parmesan cheese


  • 2 tablespoons garlic infused olive oil for frying


  • 1 can or jar of your favourite spaghetti sauce


  • 1/2 cup shredded cheese


  • 1/2 packet fettucine (I used gluten free)


  • 2 tablespoons garlic infused olive oil for the pasta


  • 12 thin asparagus spears


  • 1 tablespoon garlic infused olive oil for the asparagus


  • 1 tablespoon shaved Parmesan cheese


  • freshly ground black pepper to taste


  • Balsamic vinegar


    1. Preheat oven to 180 degrees C.               
    2. Mix together the breadcrumbs, Parmesan cheese and mixed herbs.
    3. Coat meat with the bread crumbs and parmesan cheese. Heat olive oil in a large frying pan, and quickly fry the meat. for no more than 2 minutes on each side, depending on the thickness of the meat.
    4. Chop up the capsicum into thick pieces and grate the cheese while the meat is frying.
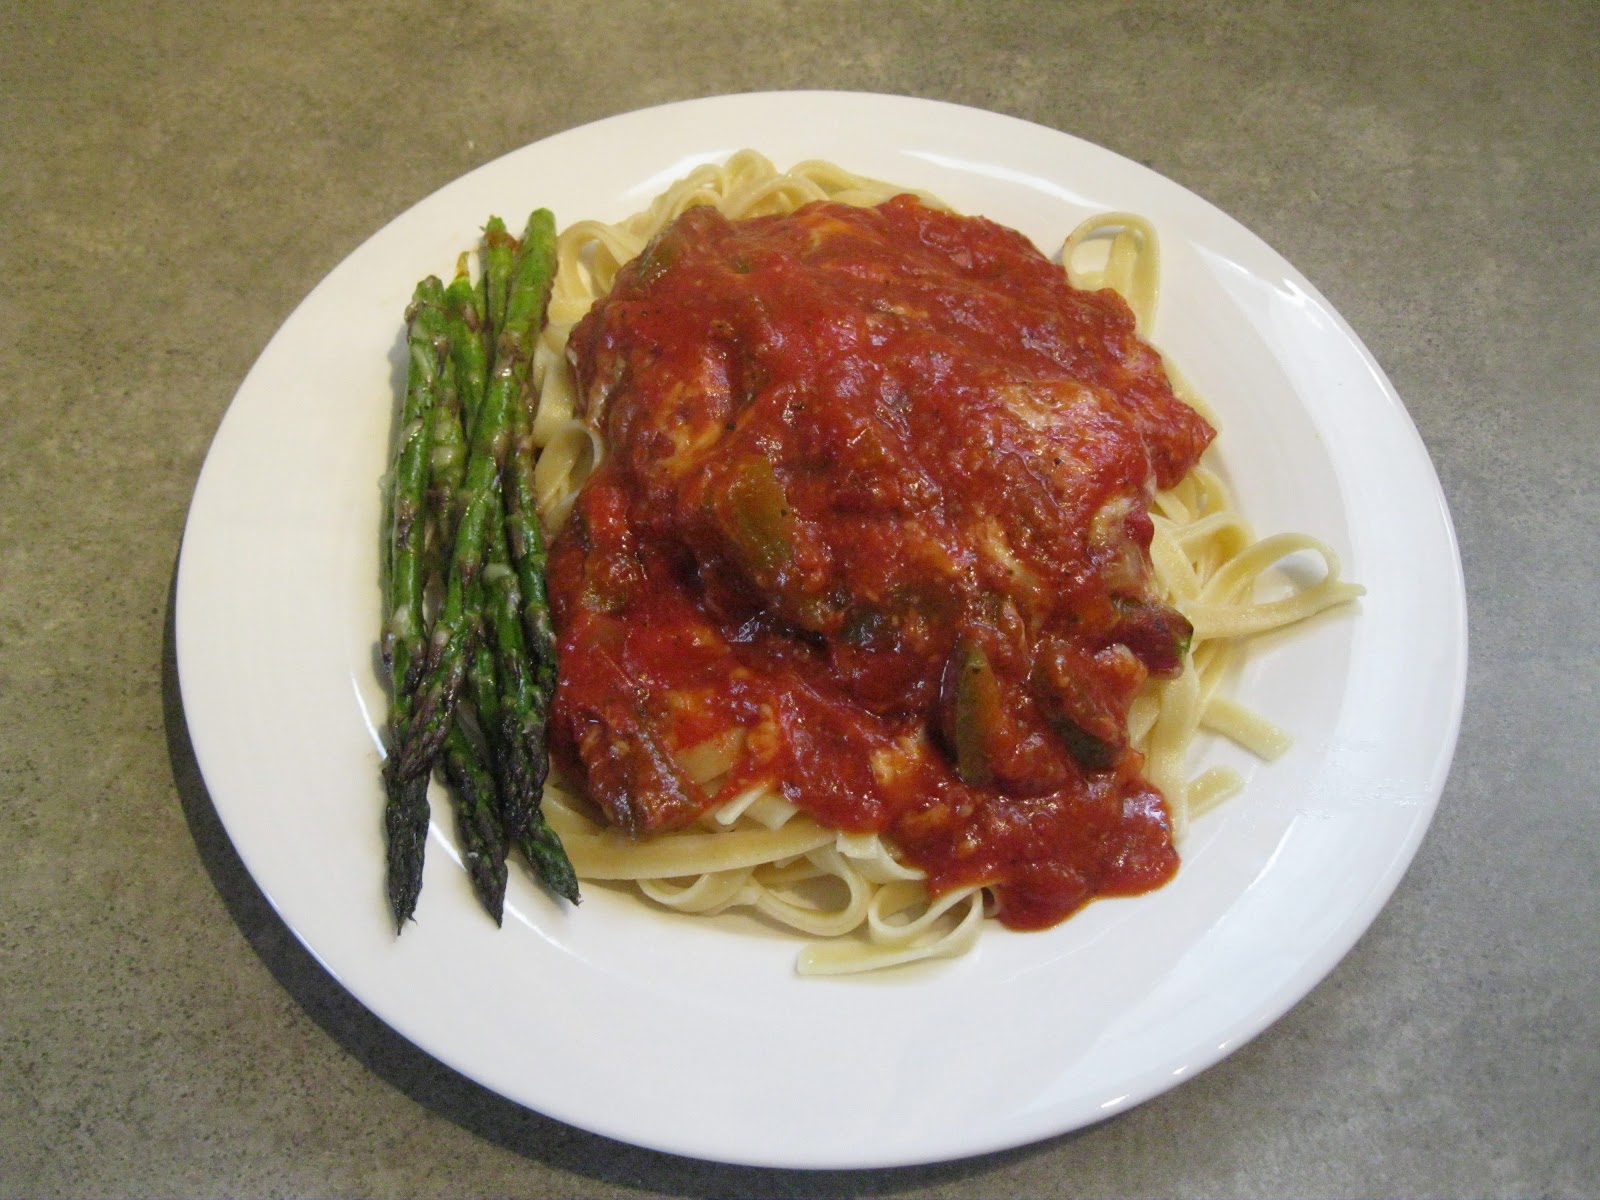
    5.  Place meat in a casserole baking dish. Place peppers on top of meat, and pour marinara sauce over the top.
    6. Bake at 180 degrees C for 15 minutes.
    7. Meanwhile- start on the asparagus. Place asparagus on a baking sheet after snapping off the woody ends. Drizzle with olive oil, and toss to coat. Arrange asparagus spears in a single layer. Spread Parmesan cheese over asparagus, and season with freshly ground black pepper.       
    8. Bring a large pot of salted water to the boil for the pasta.      
    9. When the meat has been cooking for 15 minutes, take it out of the oven and sprinkle over the grated cheese. 
    10. Place the meat back in the oven, as well as the asparagus, and leave both to cook for another 10 minutes.
    11. Boil pasta until al dente, approximately 7 minutes (slightly longer for gluten free pasta). Drain, and toss in the garlic infused olive oil. For a stronger garlic taste, season with garlic powder.
    12. Serve meat and sauce atop a mound of pasta. Drizzle the asparagus with the balsamic vinegar and place on the side.   
    Doesn't it look yummy?     


    Sunday, January 1, 2012

    A Year In Review

    What a year 2011 has been! I thought it would be interesting to go back over the year's highs and lows- sometimes we forget to reflect upon the things that have bought us joy, taught us lessons and shaped us into the people we are today.

    January: My beautiful son started walking on New Years Day. He has not stopped since!

    February: The devestating earthquake on 22nd February is forever etched into my memory. I ended up making a scrapbook to tell the story of our experience. A lot of the images still bring me to tears and make me realise how lucky I was.

    March: My husband, son and sister all went to Wanaka to get away from the aftershocks and take some time out. It was mine and Malcolm's first time in Wanaka and we loved every minute of it!

    April: My son Lucas got to meet his new cousin for the first time after a rough week in NICU. Liam Stuart is such a cute wee fellow and a great addition to the family. Lucas loves hanging out with him!

    May: Malcolm's workplace of nine years was finally torn down in May after the February earthquakes had deemed it unsafe. Malcolm had a chance to go in for the last time to retrieve any supplies before they moved into their new premises.

    June: Another significant earthquake month- two good ones in a row left us all on edge for the whole month. Our ceilings were badly damaged and our pantry got a good shaking up again!

    July: Finally something fun- we had a massive dump of snow in Christchurch that meant a two day holiday for our family. Lucas was not too sure about playing in the snow, he preferred to be cuddled up beside Dad in the warm house.

    August: My wonderful husband celebrated his birthday with friends and family- and homemade cake of course!

    September: My husband and his brothers and Dad all pooled together and put up a new fence for our house in a weekend! It looks great and helps keep Lucas safe in the yard.

    October: This time it was my birthday month! Unfortunately Lucas came down with chickenpox four days before my birthday, so we celebrated at home with Thai takeaways, wine and a movie.

    November: This was the month I discovered we were going to have our second child! The baby is due in July and I am very excited. Yes, I had to take two tests as I didn't trust the first one!


    December: Lucas turned two! He had a Wiggles themed birthday party and got some great new things to play with, including a guitar and lawnmower that he adores. I made the cake as a multicoloured marble cake in the Wiggles colours, and all the food was Wiggles themed.


    I cannot believe how fast the year has gone! I hope you all have a wonderful 2012 with lots of exciting new memories to be had.
     

    Monday, December 26, 2011

    Our Christmas Day News

    We had such a fantastic Christmas yesterday! We had 17 people at our house for breakfast from both sides of the family, and my son Lucas had a very special announcement.


    Yes, we are expecting Baby number 2 in July! We go for a scan on Friday to find out a due date, and so we are all very excited. I cannot wait to start up another pregnancy scrapbook- I guess this means I will be frantically trying to get Lucas' albums up to date over the holidays! I hope to be able to share my pregnancy layouts with you all as the year progresses.

    Wednesday, December 21, 2011

    Food: Ginger, Cranberry and Pistachio Fudge plus free recipe card!

    If you are looking for an impressive, easy food gift for neighbours, teachers or friends, this fudge is a fantastic option. It is very yummy but does not take a long time to make, and even the kids can get involved! Plus, I have put it into an easy printable 4x6 recipe card so that you can give the recipe to any lucky recipients of this fudge!


    You will need:

    2 cups brown sugar
    1/2 cup sweetened condensed milk
    1/2 cup milk
    100g butter
    1 tablespoon golden syrup
    250g pack of Gingernut biscuits
    70g packet shelled pistachios
    1/2 cup dried cranberries

    Grease a shallow 9x13 tin and set aside. In a saucepan over medium heat combine the sugar, condensed milk, milk, butter and golden syrup.

    Stir occasionally until thickened, about 15-20 minutes.

    Fold in Gingernuts, pistachios and cranberries.

    Pour into the prepared tin and put into the fridge to chill.

    Then cut into squares when set and enjoy!

    This fudge is very gingery and not too sweet, so it is great for those who don't like chocolate or prefer something small and moreish to go with a cup of coffee.

    Thursday, December 1, 2011

    December Daily

    The first of December is here! This year I have decided to do an album for the December Daily- a concept you can read more about over at Ali Edward's blog:
    http://aliedwards.com/projects/december-daily

    The idea of the December Daily is to chronicle your life throughout December and do a page for each day. The pages do not always have to be Christmas related (although a majority of mine are) and you can do as many or as little photos as you like. The journalling is the most important part of this book.

    My album will be a simple 8x8 album using the retired Winter Wonderland 8x8 Quick Kit by Creative Memories, which is a lovely blue, red and grey Christmas theme. I will endeavour to post my week's layouts when I can, depending on when I can get photos printed to complete the layouts. Since the album only has a set number of pre-designed pages, I am doing the first 24 days of December.

    My December Daily list is as follows:


    1-Putting up the advent calendar

    2- My niece Lydia’s school Gala

    3-Santa picture 2011

    4- Santa Parade

    5-Mailing out Christmas cards

    6-My Christmas wish list

    7- Creative Memories Wednesday night workshop

    8- Mainly Music break-up

    9- CM/Parent’s Centre Christmas Dinners

    10-Watching Christmas movies

    11-Creative Memories Sunday workshop

    12-Shopping for tree decorations

    13-Christmas haircuts

    14- Westpac Christmas Carols at The Hub

    15-Baking for the neighbours

    16-Santa’s grotto with mother-in-law

    17- Emillie’s birthday

    18- My son Lucas’ birthday

    19- Putting up the tree

    20-The weather for Christmas week (from the newspaper)

    21-My favourite Christmas music

    22-Christmas food shopping- add grocery list

    23-Wrapping the presents

    24- Church Christmas Eve Storytelling evening

    I hope this list gives you some great ideas. Have fun creating your December Daily!

    Monday, November 28, 2011

    Sneak Peek of my Heritage album

    I have been working on a digital scrapbook to give to my Grandfather. We will be celebrating his 90th birthday in January so this was a perfect time to go through the stories, photos and memories and put them together in a way that the whole family can enjoy. I am really pleased with how it looks so far- I was worried that I would not have a lot of information as there was a house fire in 1996 that destroyed a lot of photos and documents. However, the book is now 40 pages and I am looking forward to seeing it printed! Here is a sneak peek at some of the pages:


    All of these pages were made using the Reminisce Heritage 11x8.5 predesigned pages. Extras are from the Tie The Knot Digital Additions and the Reminisce Heritage Digital Additions.

    Monday, November 21, 2011

    Craft: Nappy Fold Pouch

    With the holidays coming up, giving wee gifts is such a nice gesture for teachers, neighbours and friends. Here is a cute way to jazz up a chocolate bar, gift card or candy cane. The original idea from this project is from Splitcoast Stampers.


    You Will Need:


    ·   One piece of double-sided patterned paper


    ·   12” Rotary trimmer with straight and scoring blades


    ·   Tape Runner


    ·   Chalking inks


    ·   Embellishments


    Directions:


    Cut the paper to 4 ½ x 4 ½ inches.

    Place the paper so that it is a diamond shape and the dominant side is facing down.

    Score paper down the middle and fold in half diagonally.


    Place the longest side facing your stomach.


    Take one of the lower corners of your triangle and fold it over to the middle of the other triangle side, adhering with tape runner.


    Take the other lower corner of the triangle and fold it over to the middle of the opposite side, adhering with tape runner.


    Take one layer of your top corner and fold it down to create your pouch. Adhere with tape runner.


    Decorate your pouch with inks and embellishments.


    You can fill this with a chocolate bar or some wrapped lollies.


    If you want to make the pouch bigger, just use a bigger piece of paper and make sure each side is the same size.
    Related Posts Plugin for WordPress, Blogger...