Sometimes it is hard to know what to get people, and so gift cards can come in handy. However, I don't like giving people gift cards just on the cardboard flap, so here is my way of jazzing it up a bit. I have adapted this card from a Splitcoast Stampers tutorial by Beate Johns.
You will need:
Two sheets of cardstock in coordinating colours (I used Honeydew and Clay)
12 inch trimmer with cutting and scoring blade
Tape runner or other strong adhesive tape
Corner Rounder
Stamps, ink, ribbon and embellishments to decorate
Patterned paper
Please note that all measurements for this pocket card are in inches.
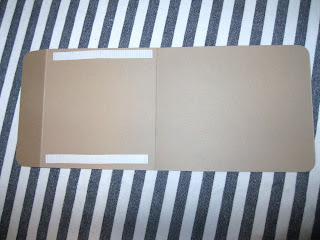
The first step is to cut your card. One piece should be 4 1/2 x 11 for the pocket, and the other should be 3 1/4 x 5.
Score the larger peice of cardstock at 5/12 inches and then again at 1 1/4 inches.
Corner round all four edges of the larger piece of cardstock.
Fold the card so that the 1 1/4 flap is folded over and facing towards you.
Decorate the front flap as you want using the patterned paper.
Since this pocket card was for a birthday present, I used my Punch Bunch Happy Birthday stamp and punched it onto a scrap piece of Honeydew cardstock with Chocolate Chip ink, and then cut it into a square and corner rounded the edges.
Using the tape runner, adhere your pocket card together down the long sides of the smaller flap.
Add the stamp, ribbon and other embellishments to the front of your card.
To make the pocker insert, add a strip of patterened paper to the top edge of your smaller peice of cardstock. I used the back of the polka dot paper, which had the stripe pattern on the other side.
Corer round the top two edges of the cardstock to make it easier to pull out.
Attach the gift card to the insert.
Slide the insert into the pocket of your card.
And there you have it! A lovely wee card that can be used to put any type of gift card in. This can be changed up in many ways for birthdays, weddings, baby showers etc by changing up the cardstock colours, embellishments and stamps that you use, so it is very versatile.


No comments :
Post a Comment
I love getting comments!